1. To add a survey asset to a page, go to the tool panel in client view and click the + icon or the Course content button. Click Add page. Select your preferred template and enter a page title.
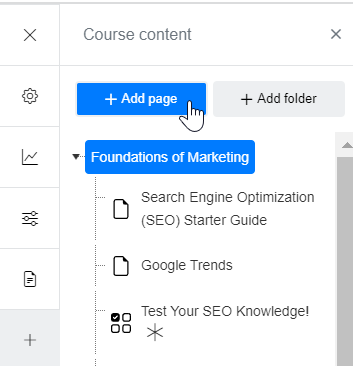
Enabling the Track as learning objective button will make the page a learning objective. Once done, click Save
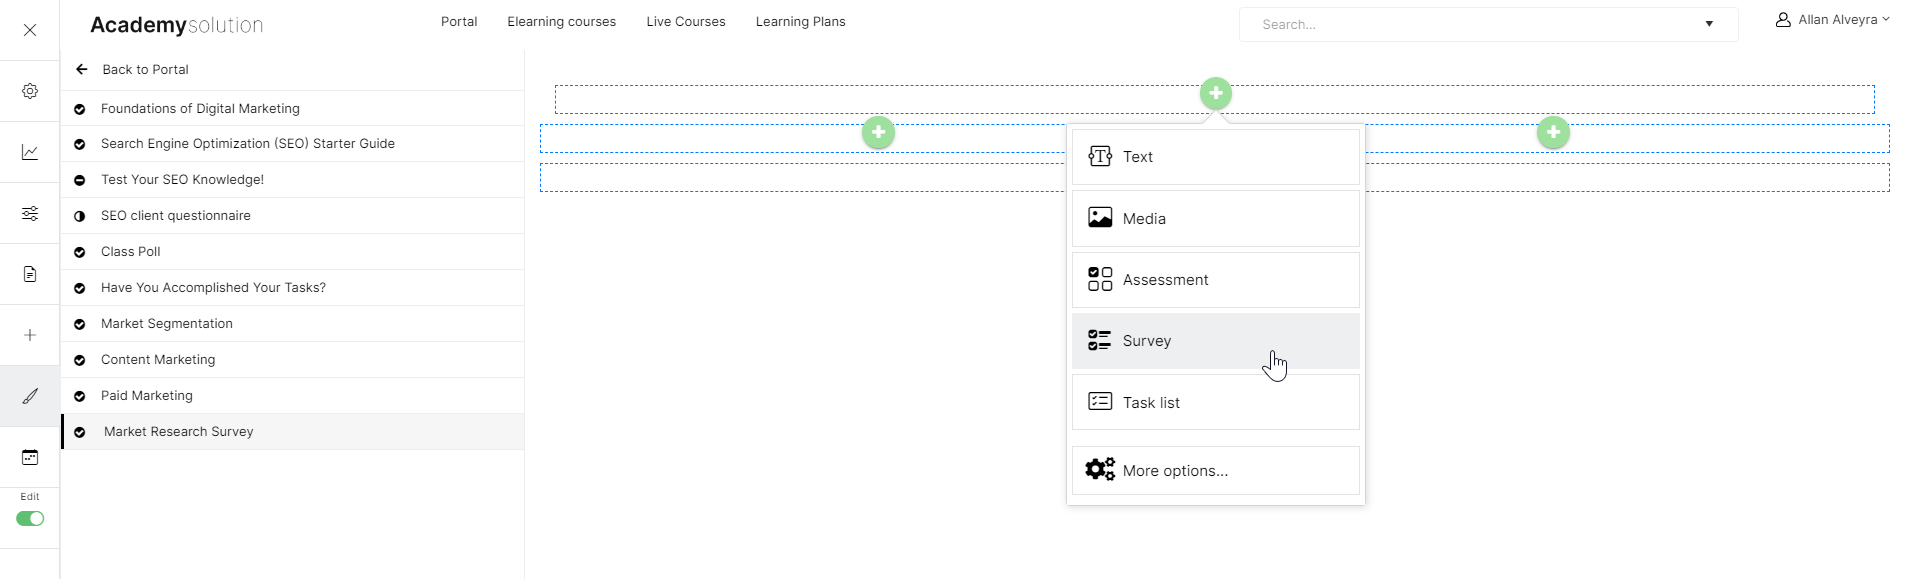
2. Upon saving, click the + icon to add an asset to the page. Select Survey.
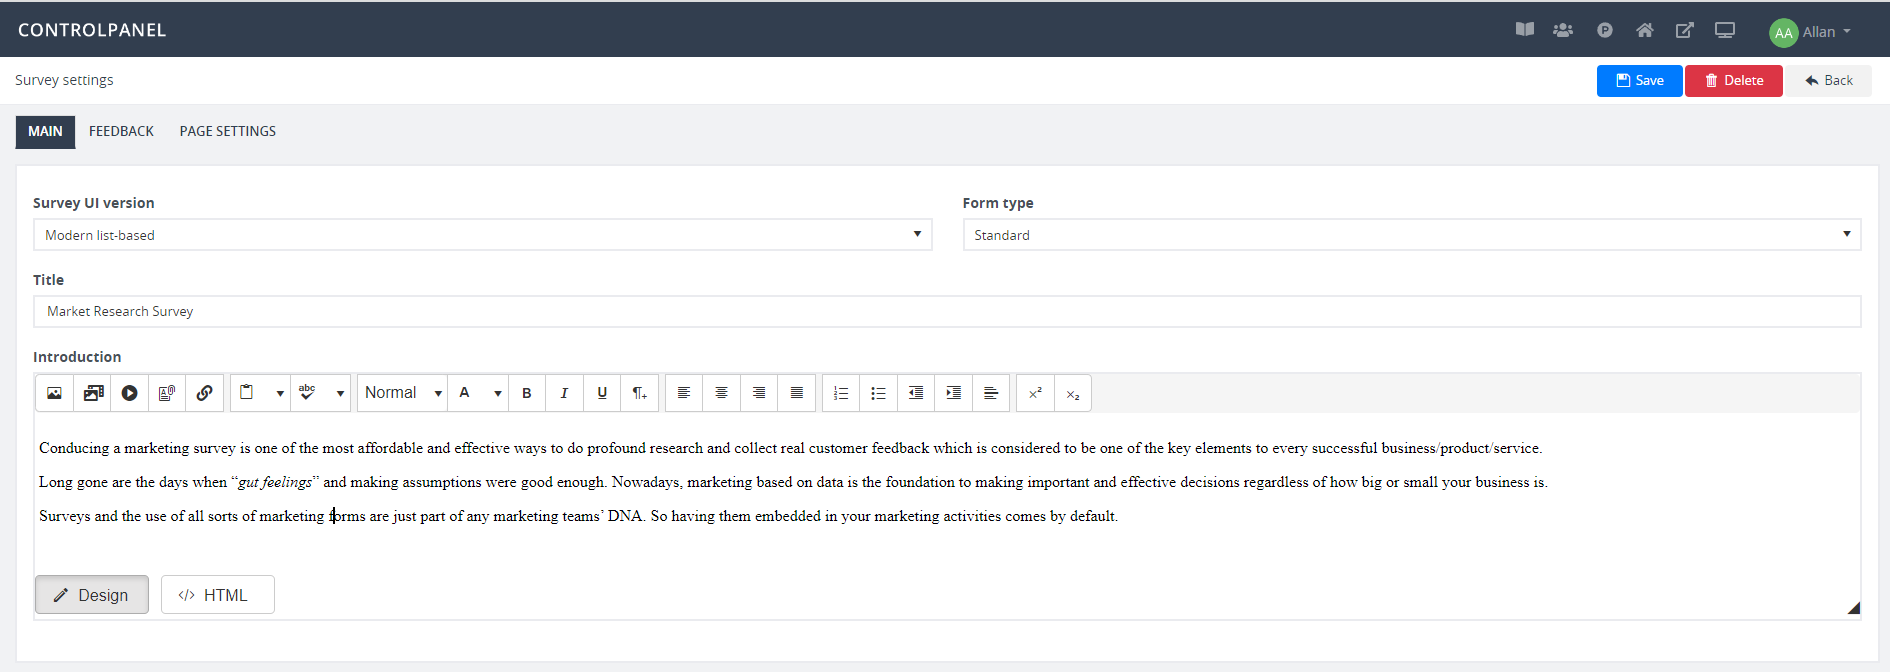
3. Add a short survey description. To change the UI version of your survey asset, click the dropdown under “Survey UI Version” and select one from the following options:
- Classic table-based – shows a basic two-column table UI template where a question is followed by a selection field or box.
- Modern-based – uses larger text fields for user input. Unlike a table-based design, a modern template is designed like a typical digital survey form, where text fields are placed below the survey questions.
- Wizard type – guides users through a series of steps that must be completed to finish the survey.
- Page based on groups – use this type to categorize or group survey questions. This design works like a wizard type where users navigate through a series of grouped pages to complete the survey. (Only available in Full Admin)
- Users Submit History – provides a summary of all submitted survey responses
- Feedback on users latest submit on slide – used to provide feedback on a user’s latest survey submission.
Use the different form types for various survey purposes. Example:
- Standard - choose this type for basic forms of surveys such as those requiring straightforward responses.
- Requirement form - select this type when users are required to provide their personal information or contact details
- Opinion poll - use this to measure your users’ views regarding a particular topic or series of discussions within a course or session.
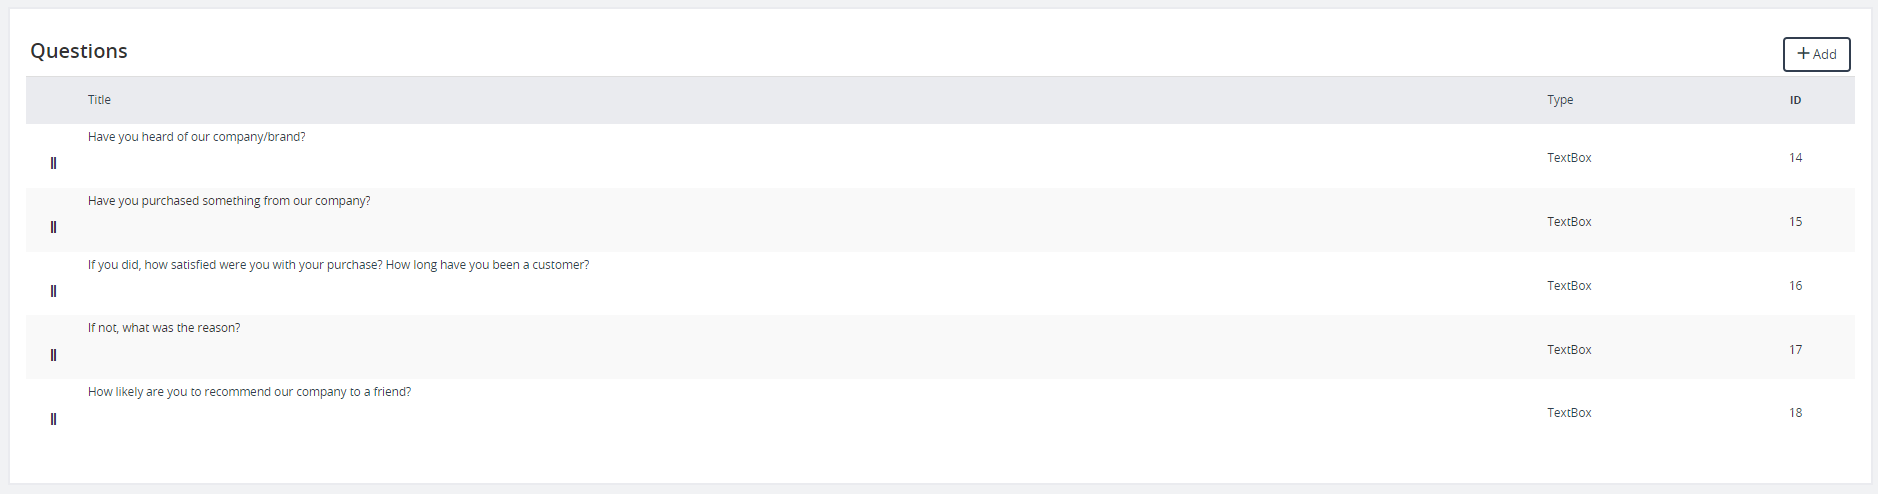
4. Under Questions, click Add to create a survey question.
6. Select a question type and then click Next. Ex. Multiple choice.
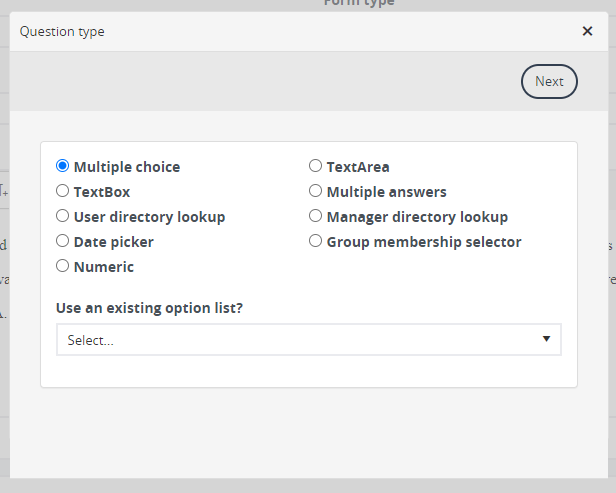
Types of Questions
- Multiple choice – contains multiple answer options.
- TextBox – select this type when collecting short answers from users, in text form
- User directory lookup – select this type when responses require searching users from a directory.
- Date picker – use this type if responses require entering a specific date.
- Numeric - is similar to a text box but uses numeric values as input.
- TextArea – choose this type if the question requires users to input longer texts.
- Multiple answers – select this type if users must choose more than one of the choices provided.
- Manage directory lookup – select this type when responses require searching managers from a directory.
- Group membership selector – use this type when responses require selecting a group
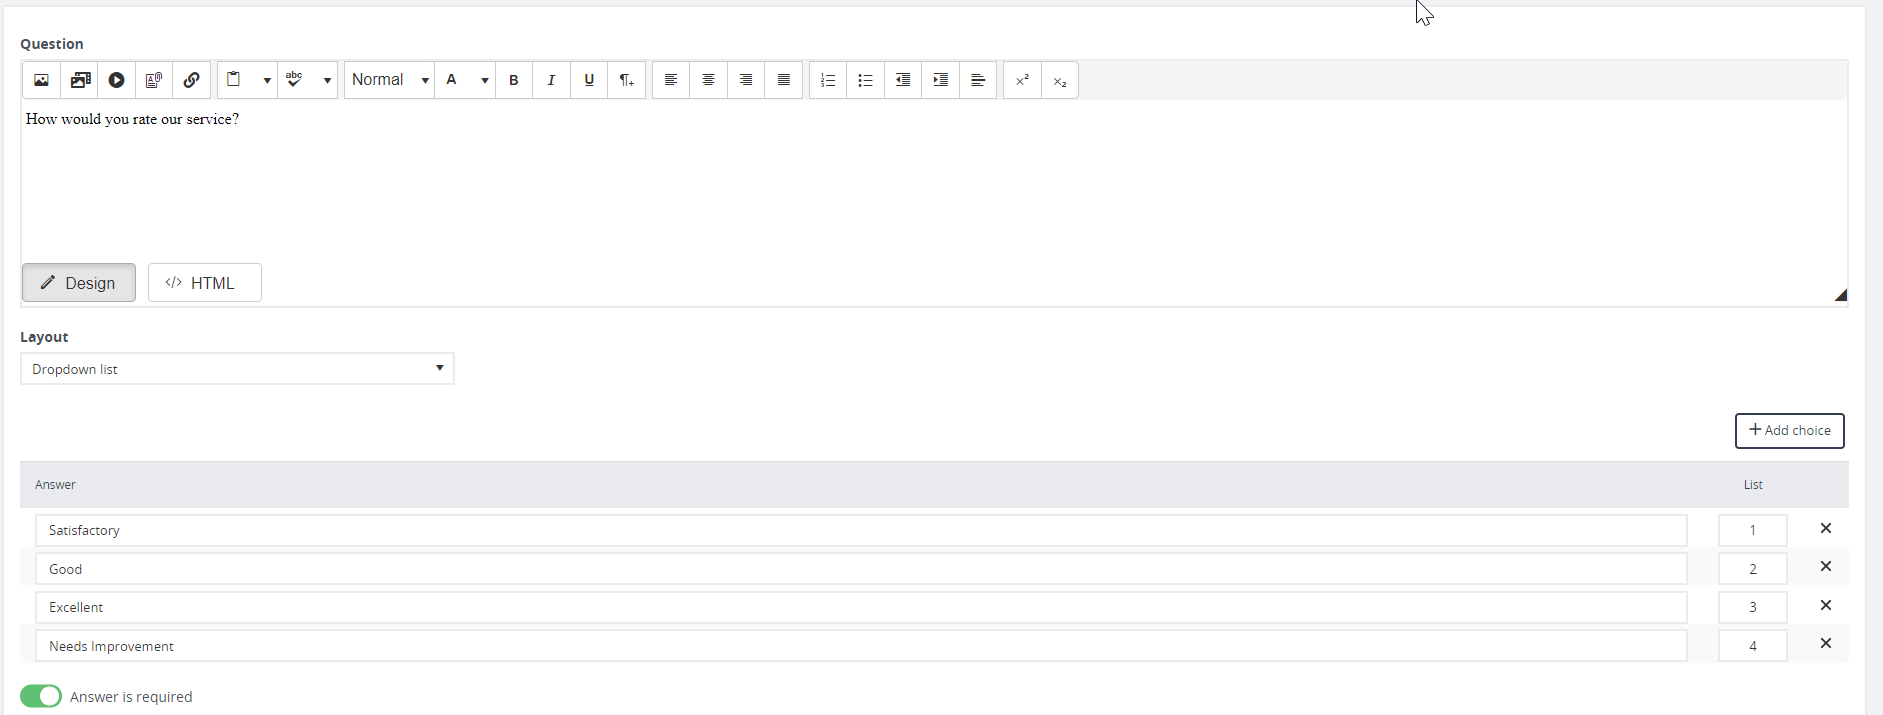
7. On the text editor, enter your question and the answer options below. You can add multiple options by clicking Add Choice. If an answer is needed, turn on “Answer is required” and add an error message if no response was provided.
By selecting an answer type, you allow users to provide answers they can update. You can also set the answer type to "no update" when you want users to submit a single answer that cannot be updated. Below are the different descriptions of each answer type:
- Single answer with update – choose this type to allow users to update their answer
- Single answer with no update – select this type if you want to restrict users from updating their answer
- Multiple answers – use this type to allow users to provide multiple survey responses
- Single answer per Course Session – use this type if a course session with a survey asset requires only a single answer

Note:
Enabling the "Set status completed upon submission" button will trigger the system to change the status to "completed" when a survey is accomplished and submitted. And turning on the "Anonymous" button enables you to hide a respondent’s name.
8. Once survey questions are added, click Save to finish.
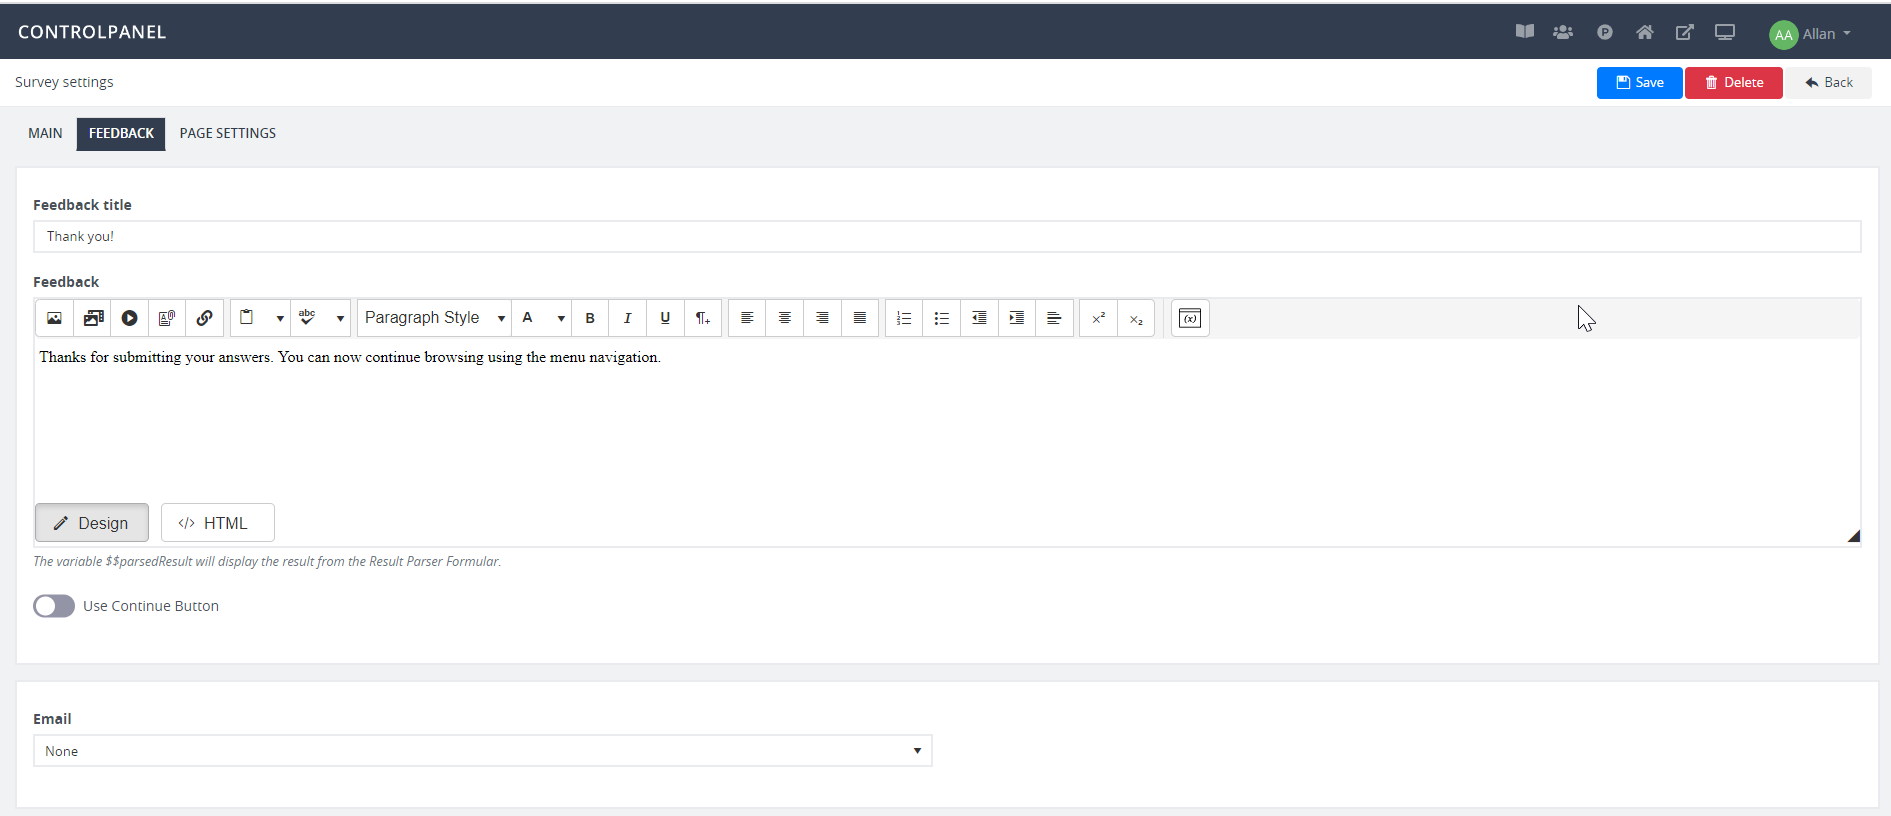
9. You can create a feedback message to notify users about the survey completion. To do this, go to the Feedback tab. There, you can write a custom feedback message and send an email notification to confirm survey submission. Remember, you may or may not send an email notification. So, if you wish to configure this functionality, choose from the following options:
- None - no email or notification will be sent to the user
- Send email notifications on submit – an email will be sent to the user upon submitting the survey
- Send email notifications on submit (including survey data) - an email containing survey data will be sent to the user upon completion
Enable the Use Continue Button to prompt users to their next action after completing the survey. Select one option from the dropdown list to set a navigation action:
- Go to next
- Go to CAID
- Go to user's last bookmark
- Go to start page
- Go to user's default course
- Go to previous