Map authentication between installations
Updated 6 years ago /
1 min read

By setting up and mapping authentication between two Cursum Learning Center installations, you can authorize users on the requesting installation to have access to the domain on the target installation. This enables you to share settings and content from one installation to another. To do this, the first step is to create a domain on the target installation and ensure that you assign a relevant group to the domain, for example, All Users and All Reporting Viewers. This group should have portal, roles, and content assigned to it. For the complete steps on creating a domain, please see this article.
Once you've successfully created a domain, the following steps should be done in this order:
- Sync installations with the App Center
- Set up and map installations in the App Center
- Set up the Launcher asset on the requesting domain
Sync installations with the App Center
To sync installations with the App Center:
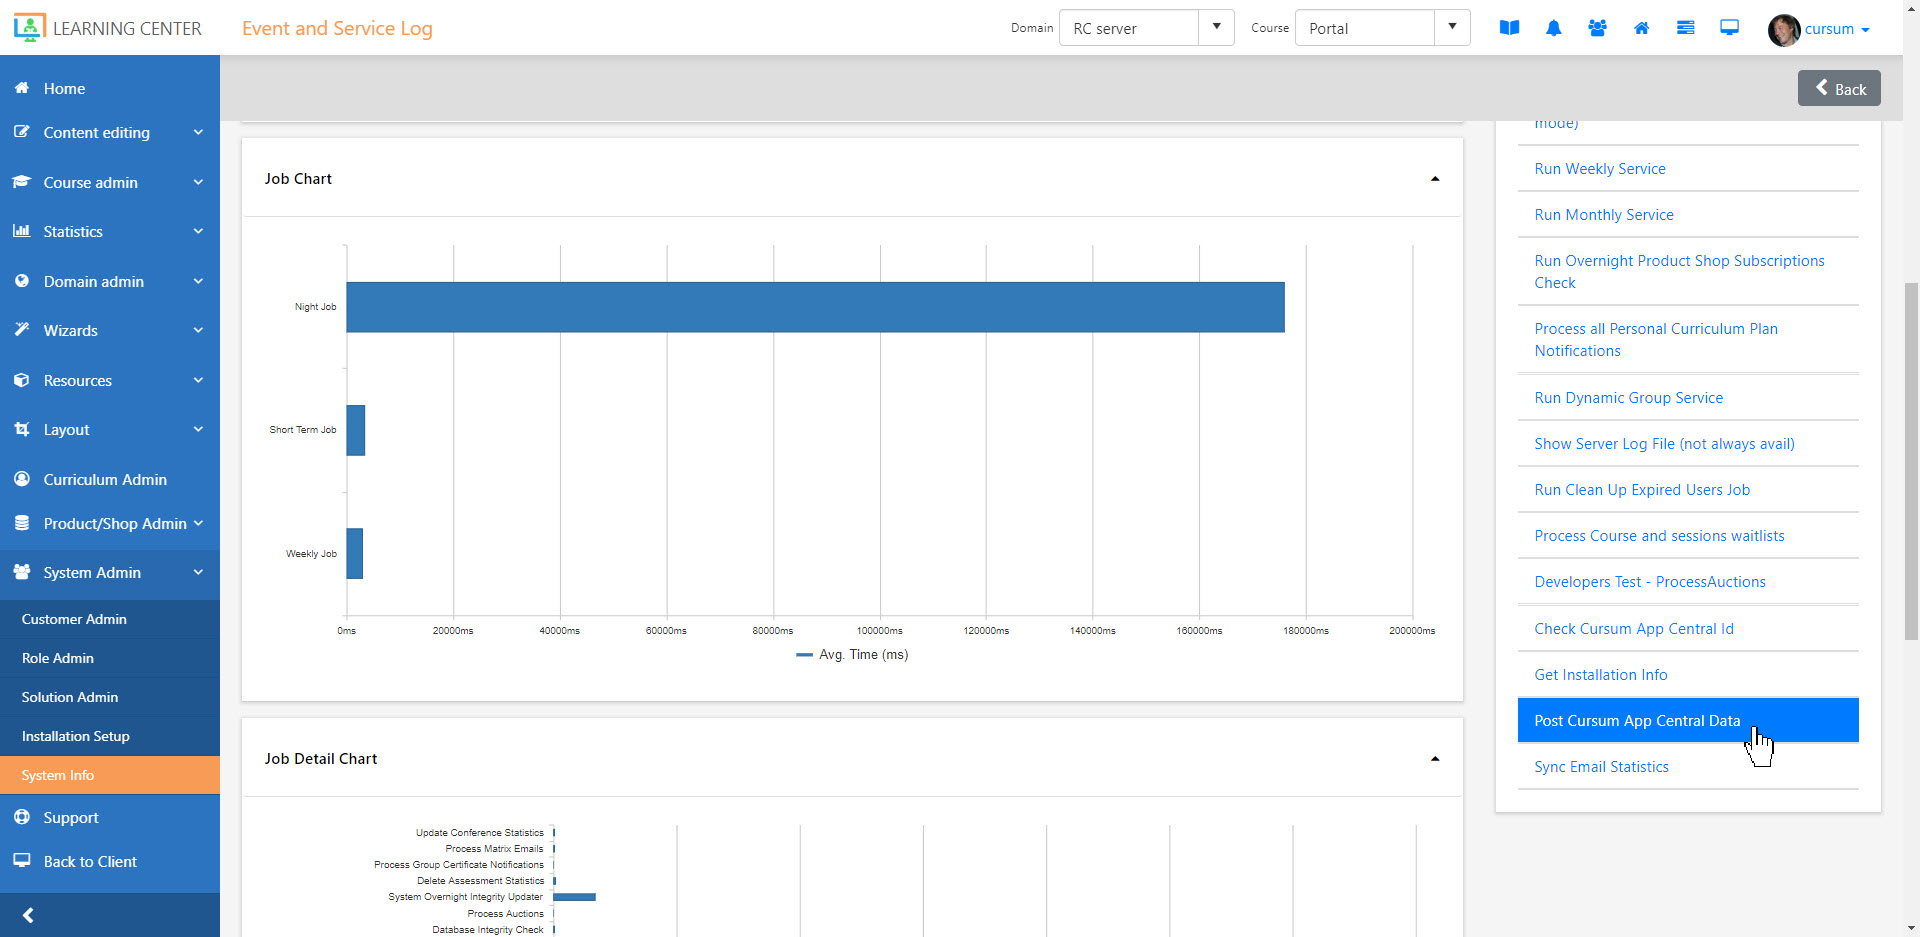
- In Full Admin, click System Admin, System Info.
- In the Actions menu, on the right, click Installation Event Log.
- On the page that appears, in the Actions menu, click Post Cursum App Central Data.
The installation data is now published in the App Center.
Set up and map installations in the App Center
To set up and map installations in the App Center:
- Log in to the App center using your login credentials in Cursum Learning Center.
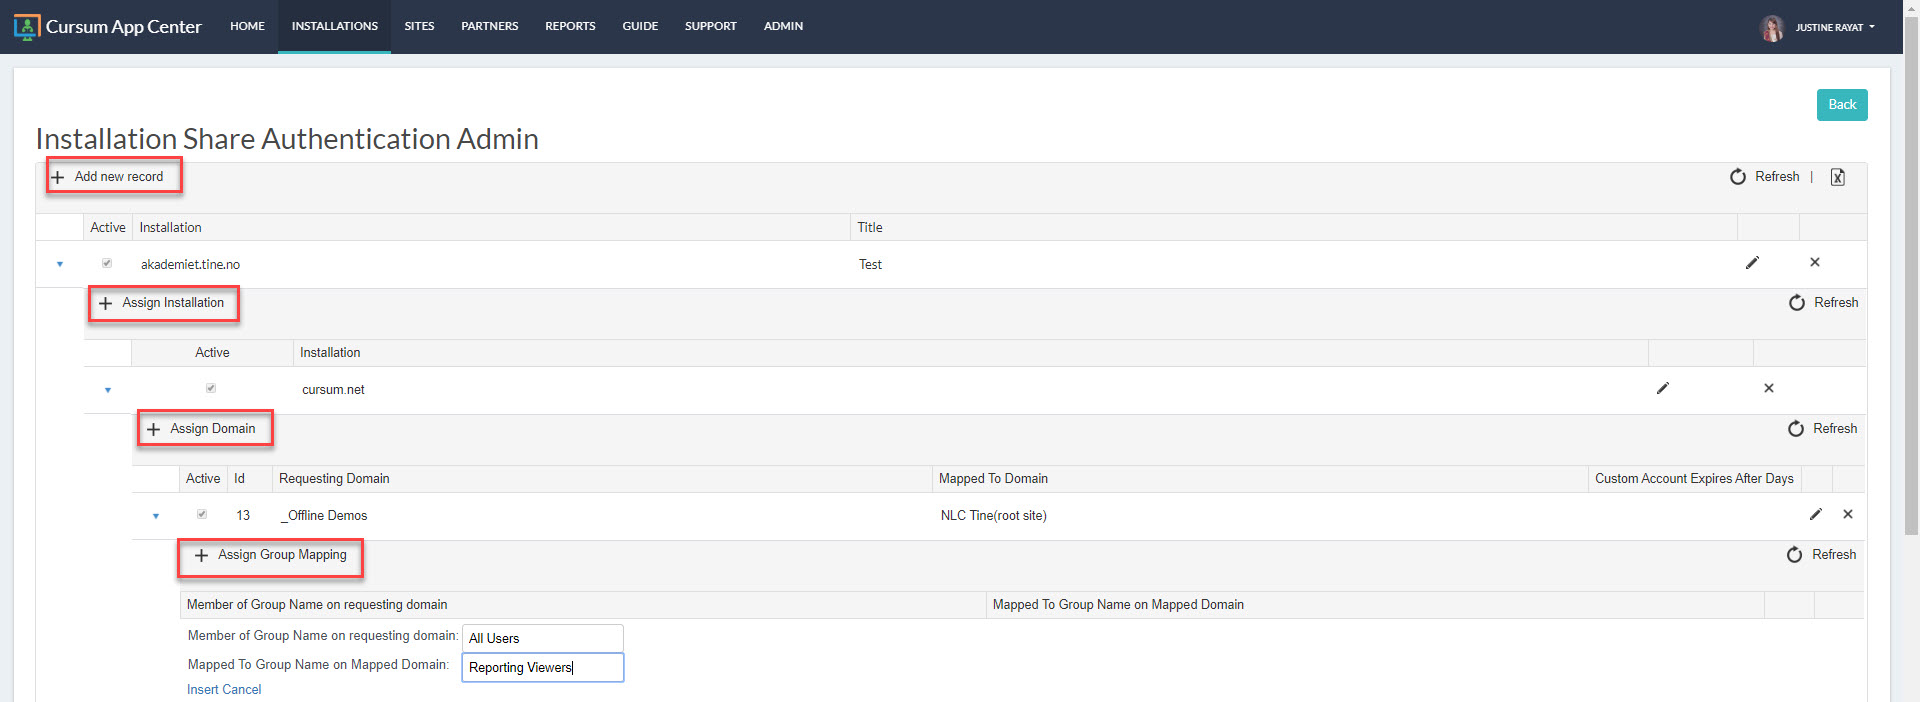
- On the Admin tab, under App Center Administration, select Installation Shared Auth Admin.
- Click Add New Record to add the target installation, and then click Assign Installation to assign it to the requesting domain.
- Click Add Domain to map requesting domain and the target domain.
Note
If any of the installations or domains aren’t showing up in the list – sync each of the installations with the App Center and repeat the steps above.
- Click Assign Group Mapping to map groups between the two domains on the installations.
The domain and group on the requesting installation are now mapped to the ones on the target installation.
Set up the Launcher asset on the requesting domain
To set up the Launcher asset on the requesting domain:
- In Full Admin, click Content Editing, Content Explorer.
- Right-click the relevant slide and select Go to Slide Editor.
- Choose External Website Launcher as the asset type then click Save.
- On the page that appears, in the Type dropdown, select External Learning Center Installation via App Center Shared Auth Provider.
- In the App Center Shared Installation dropdown, choose the target installation. If the newly created mapping from App Center doesn't show up, you need to flush the cache on the requesting server and try again.
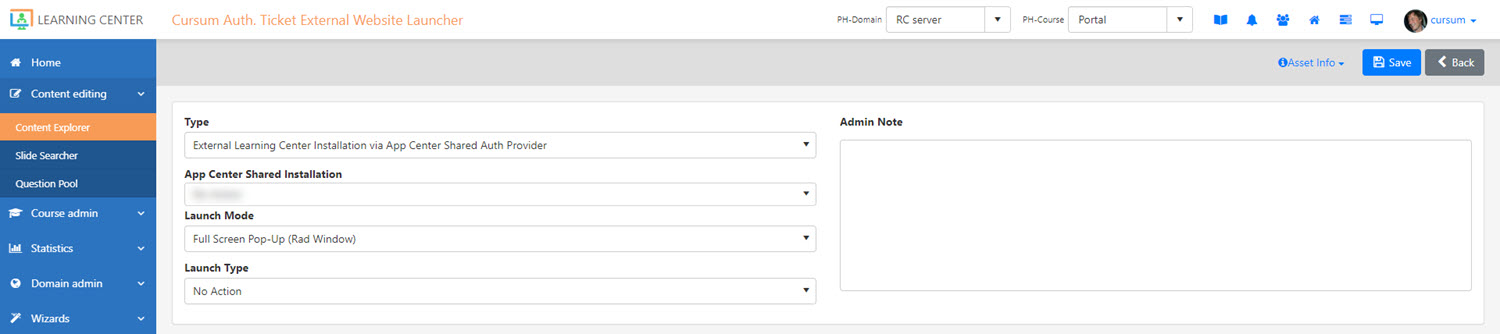
- Specify where and how you want to launch the content on the target installation and domain.
- Click Save.
Your users are now redirected to the new target installation with the settings and content that you've shared.