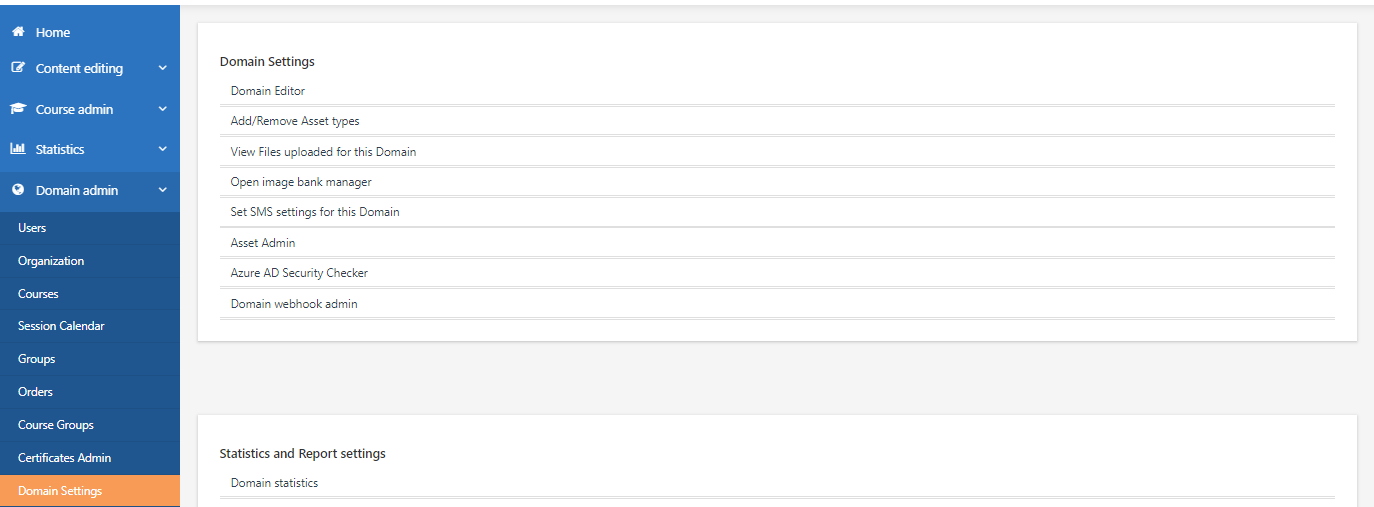
In Domain Admin, click Domain Settings, Domain Editor.
Go to the General Settings tab and under External User Sync Settings, turn on Enable User+Group Sync via SCIM. Click Setup SCIM.

It's up to the customer whether to use these settings – but set it to this first and ask what the customer wants.
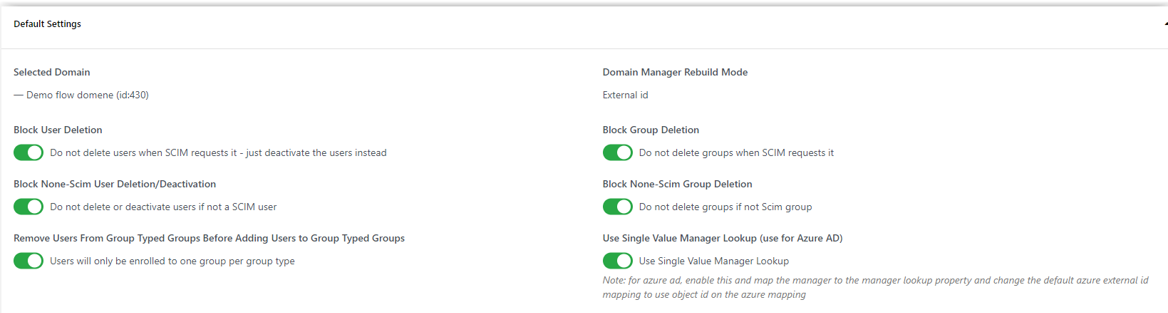
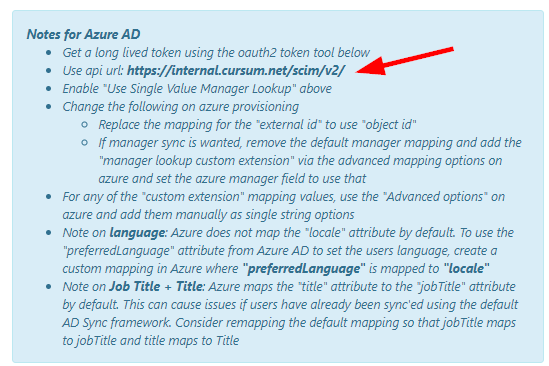
Enable "Use Single Value Manager Lookup" above.

Scroll down to Advanced Settings and add a default password. This is not used by the user; the system just needs a generic password. The user will use the SSO password.

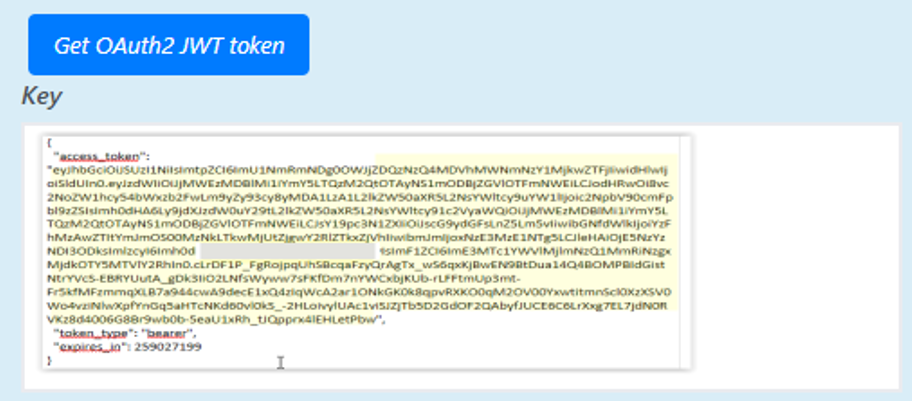
Use the username and password you set up to get an authentication token. Under the OAuth Token Request Tool, enter the username you created, its password, and the days of the expiry period. Click Get OAuth2 JWT Token.
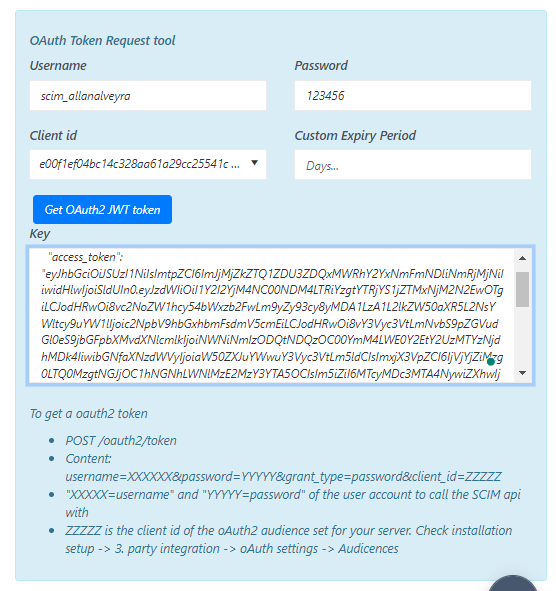
Set 3000 in the Expiry Period. The authentication key is used when setting up Azure.
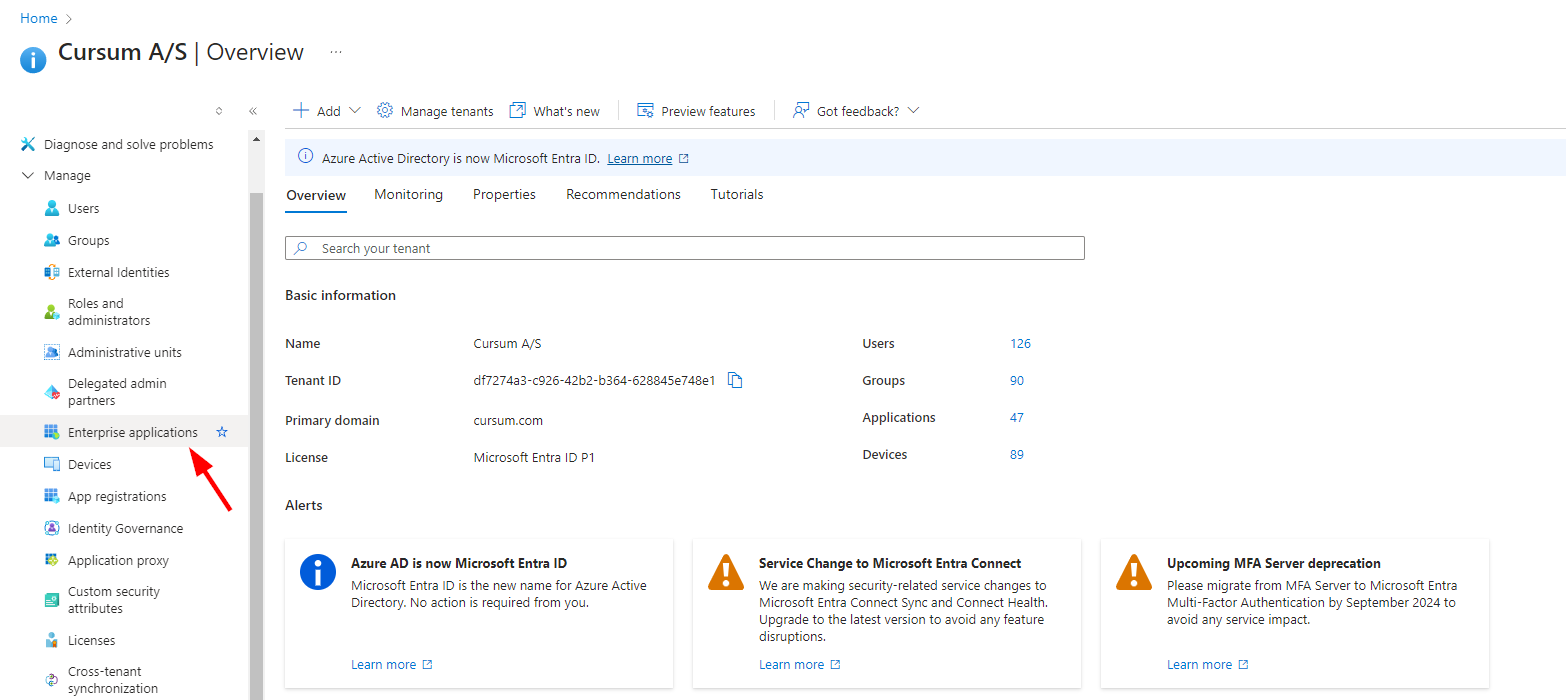
This is what the customer does on Azure.
Step 1:
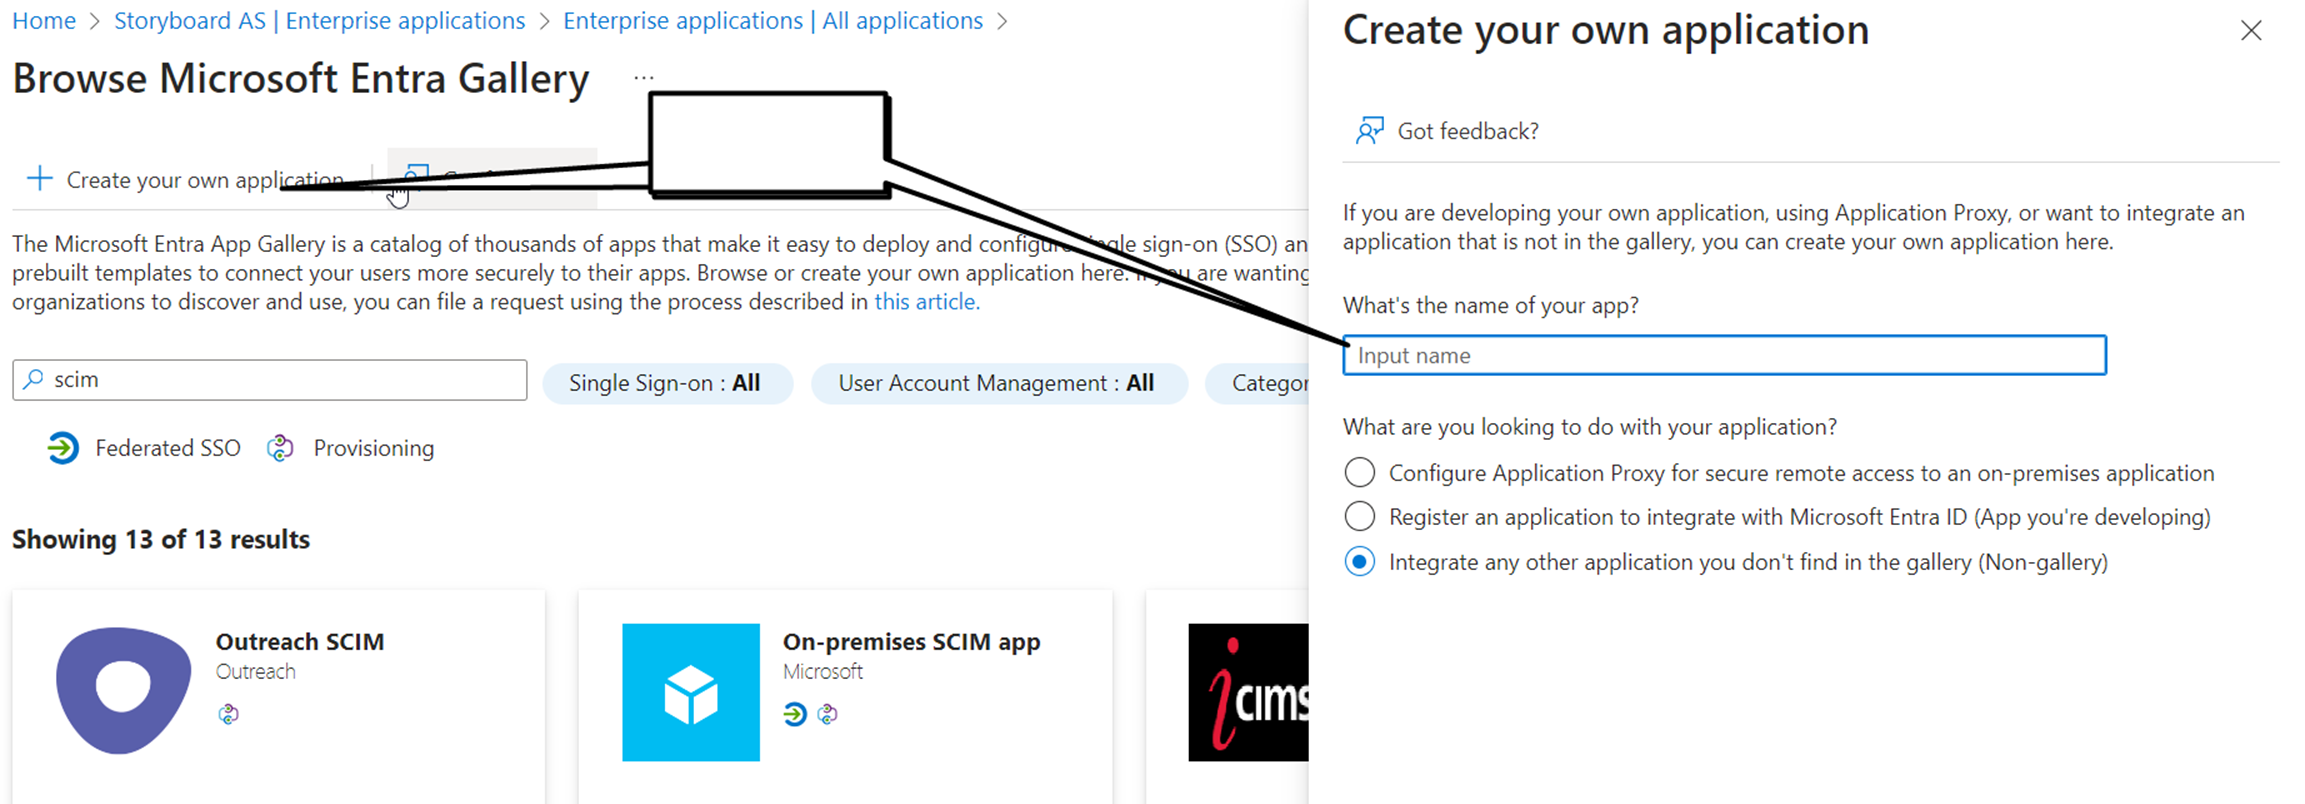
Step 2: Create your own application.
Step 3: Enter the App name suggestion (CUSTOMERNAME to “nameofportalLMS” – SCIM app)
Step 4:
Save down.
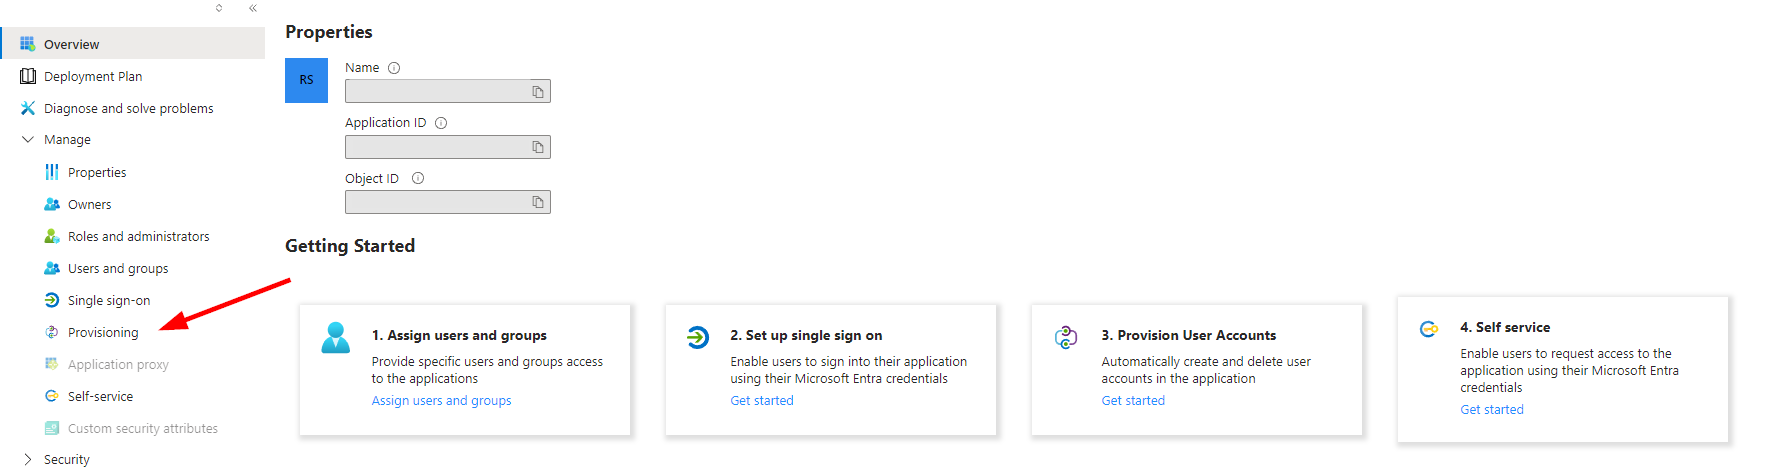
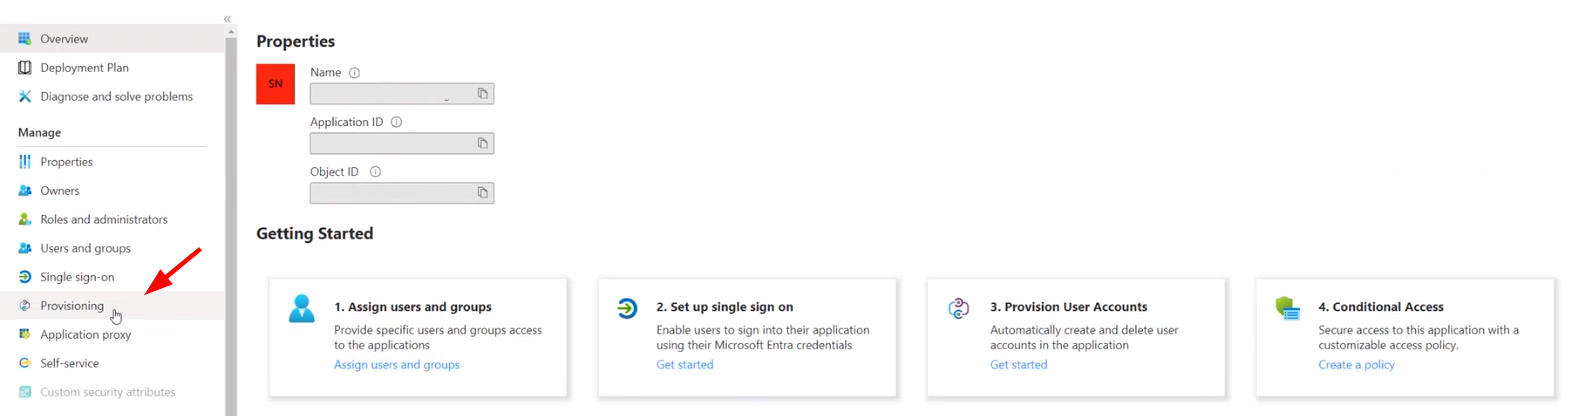
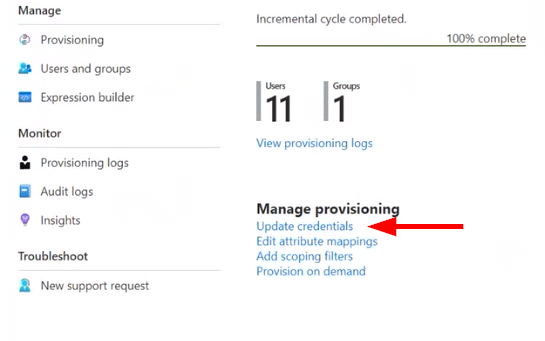
Step 5: Select Provisjoning.
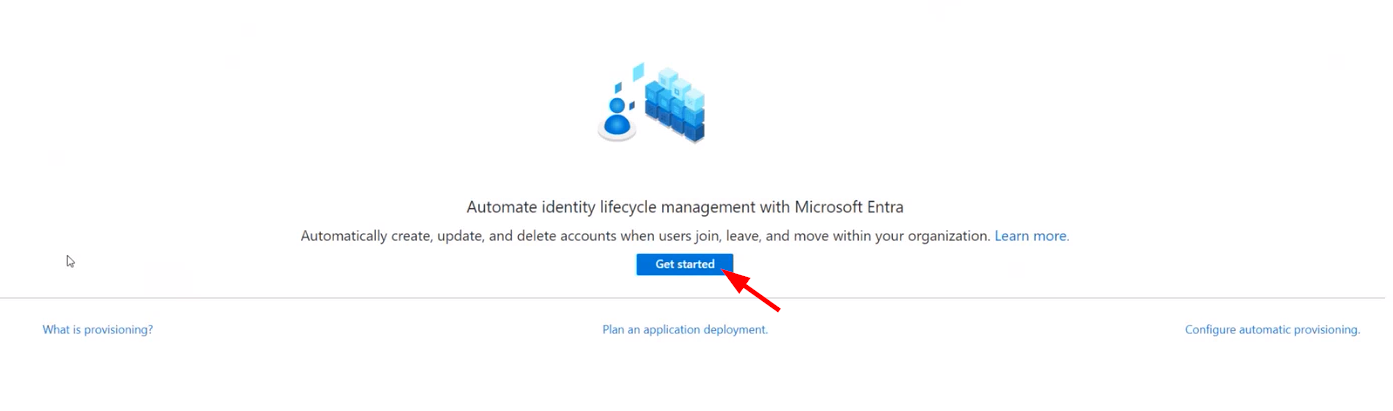
Step 6:
Step 7:
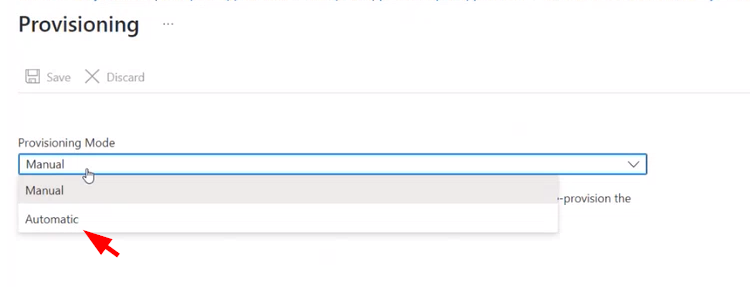
This can be set to manual until you are ready to start it.
Step 8:
Example:
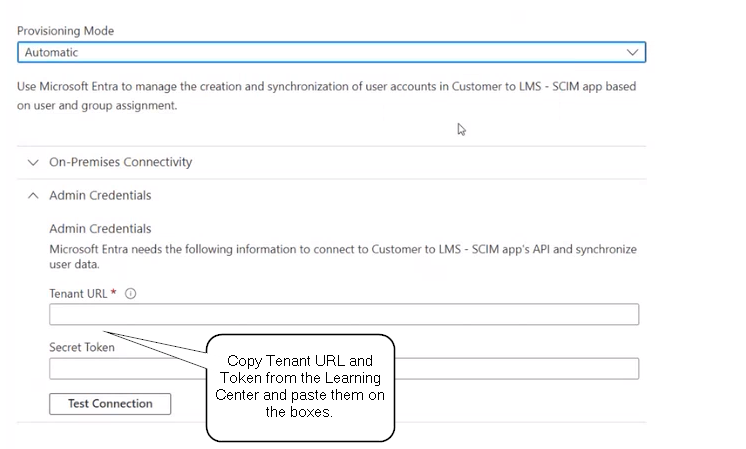
Copy from the “to the" at the end. And paste this into Azure Secret Token.
Step 9:
Step 10:
Step 11: Fill in URL and Paste in secret. And test connection.
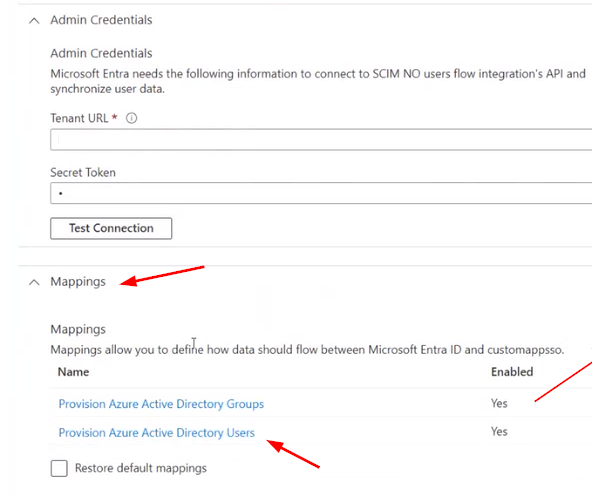
We suggest you set Provision Azure Active Directory Group to be No untill you have tested everything
- Change the following on Azure provisioning:
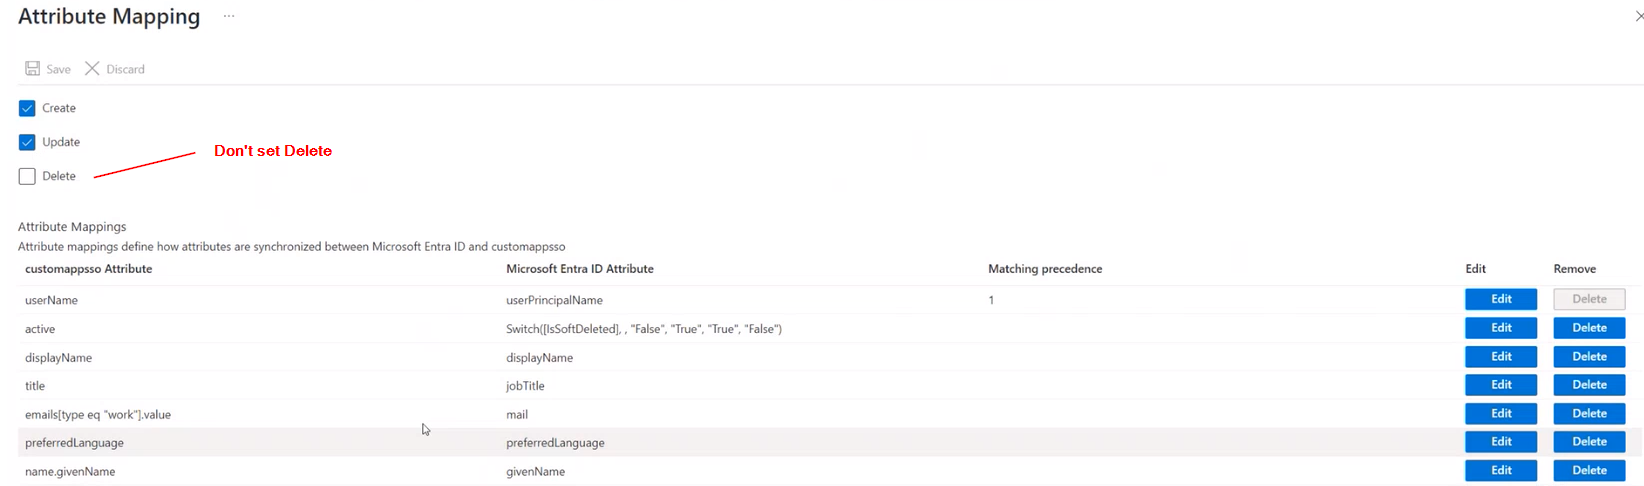
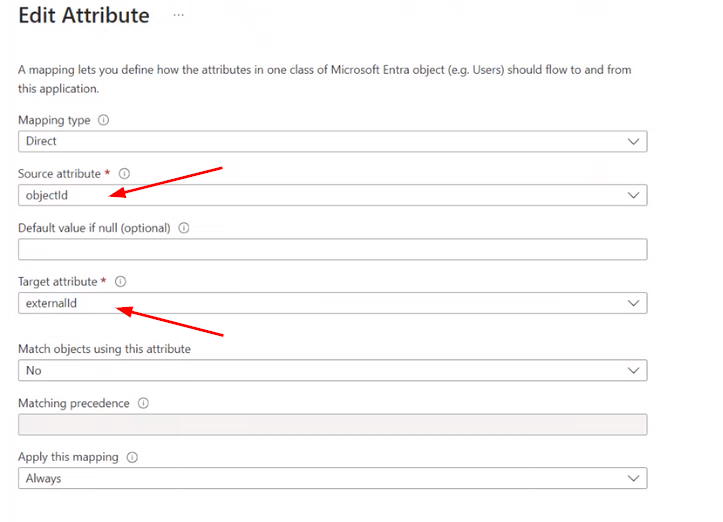
- Replace the mapping for the "externalid" to use "objectid"
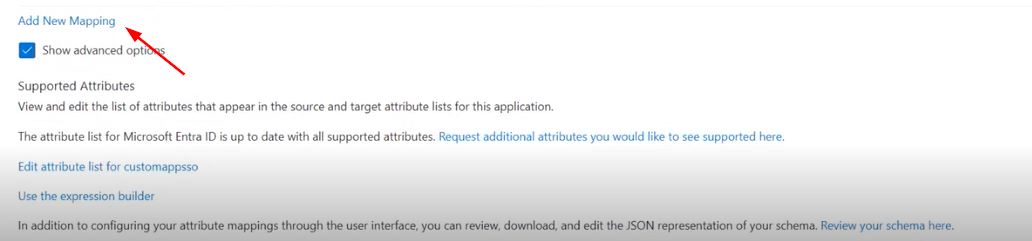
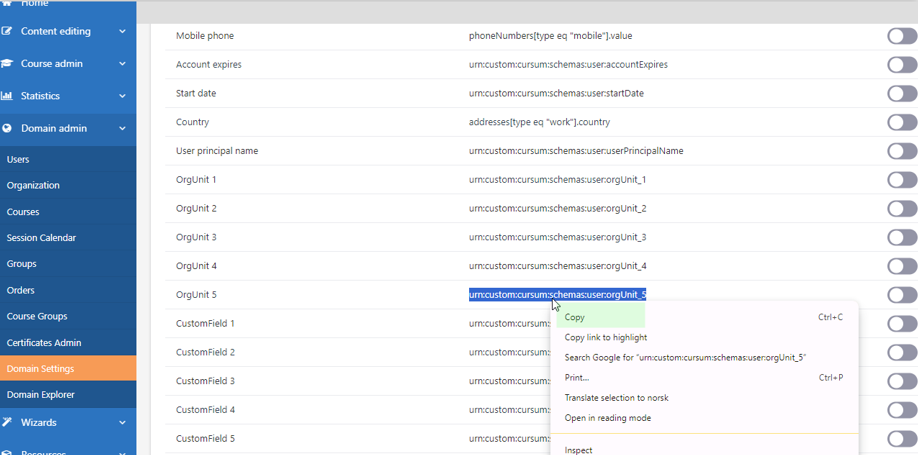
- If manager sync is wanted, modify/add the default manager mapping and add the "manager lookup custom extension" via the advanced mapping options on Azure and set the Azure manager field to use that. You can find the different Attributes that you would use, see picture further down.
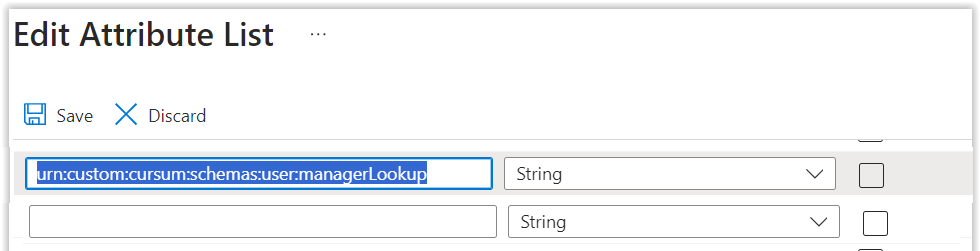
Go back to Azure, Edit the manager setting, and modify to use: urn:custom:cursum:schemas:user:managerLookup.
- For any "custom extension" mapping values, use the "Advanced options" on Azure and manually add them as single-string options.
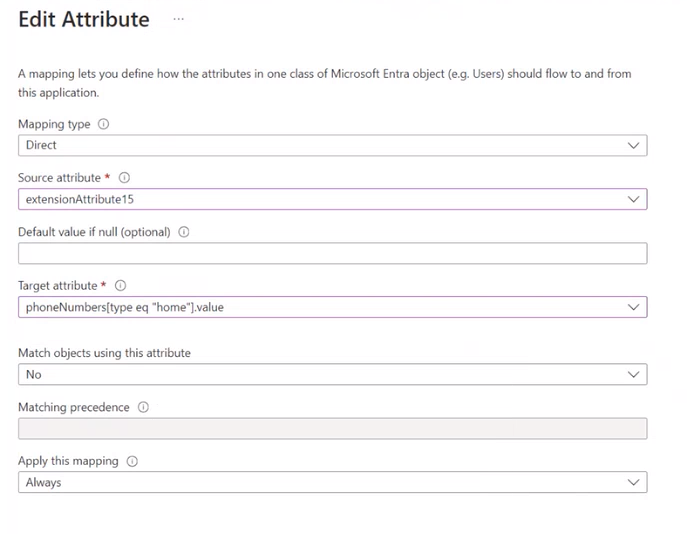
The Target attribute can be copied from the LearningCenter SCIM settings. In this case, we have set up that the value of the extensionAttribute15 in Azure should be mapped to the OrgUnit_5 in LC.
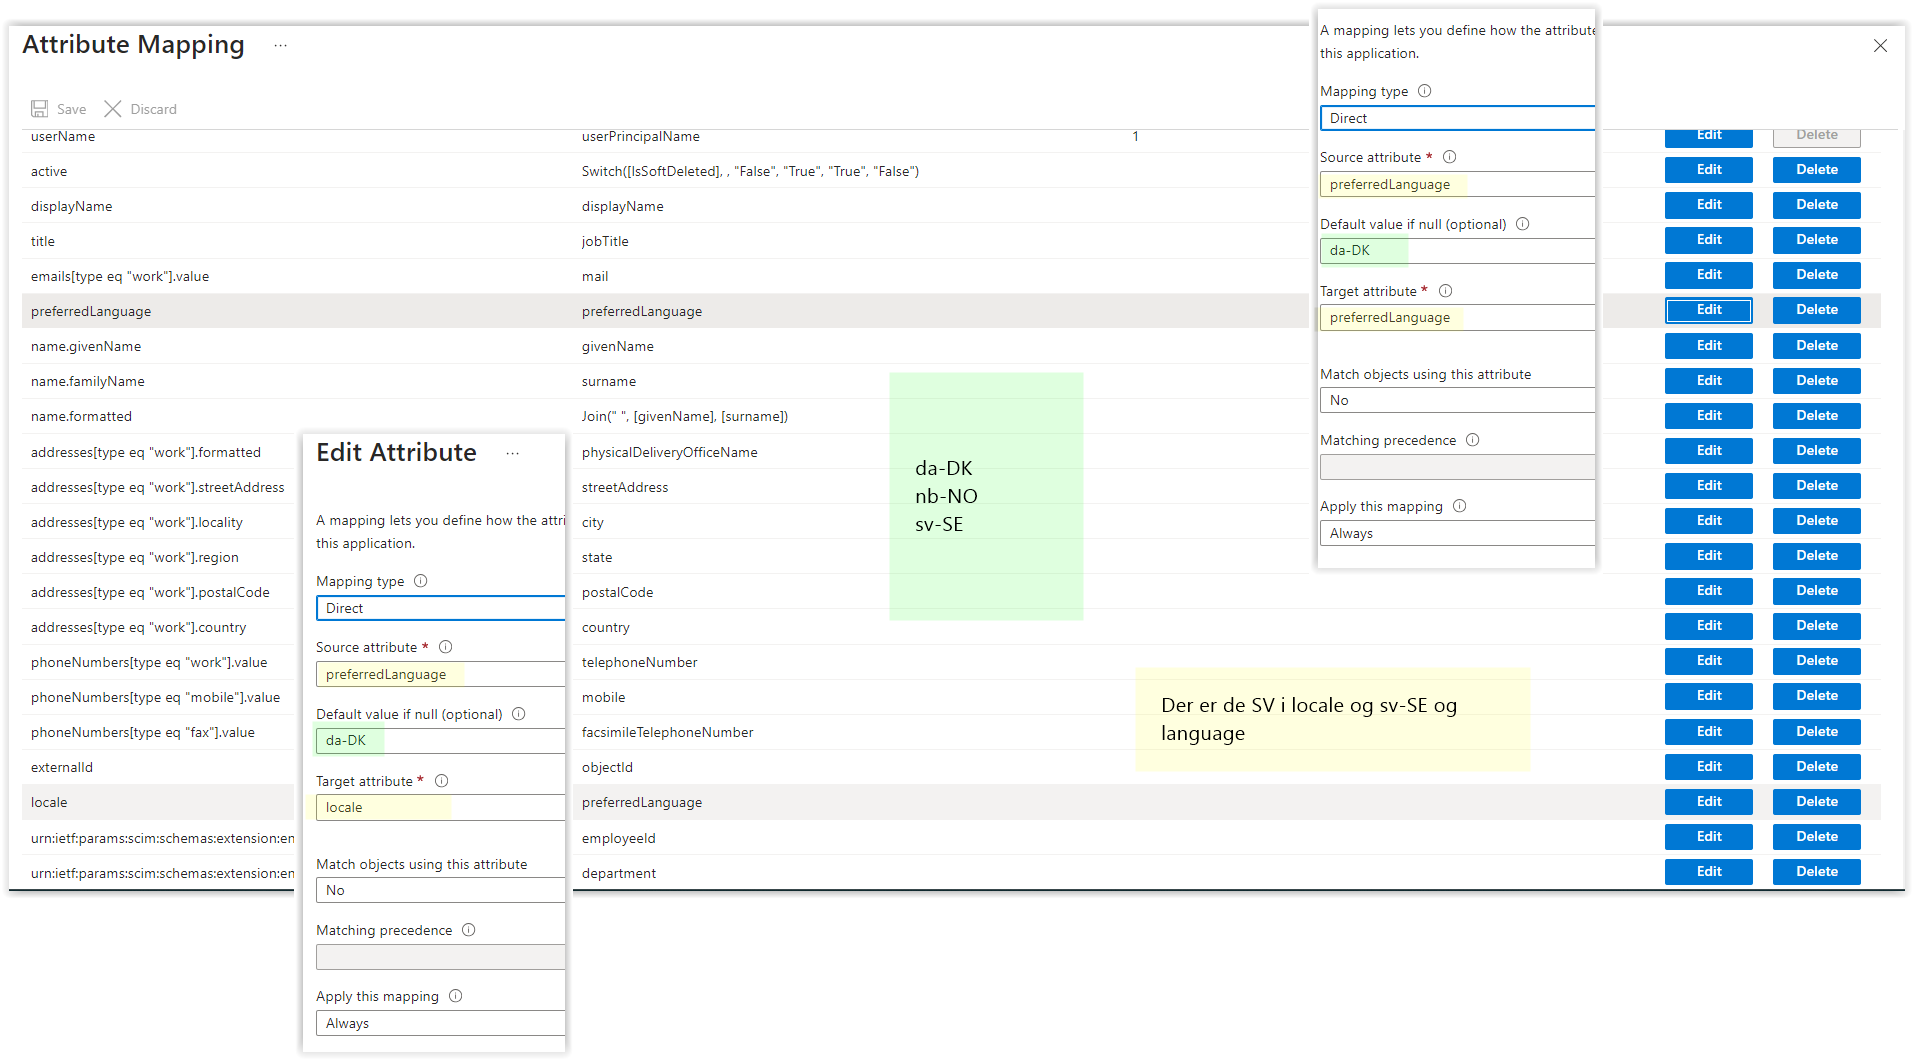
- Note on Language: Azure does not map the
locale attribute by default. To use the preferredLanguage attribute from Azure AD to set the user's language, create a custom mapping in Azure where preferredLanguage is mapped to locale. Also, map preferredLanguage to preferredLanguage and set the default value if null to the desired language.
- Note on Job Title + Title: Azure maps the
title attribute to the jobTitle attribute by default. This can cause issues if users have already been synced using the default AD Sync framework. Consider remapping the default mapping so that jobTitle maps to jobTitle and title maps to Title.
Learn more about SCIM here: