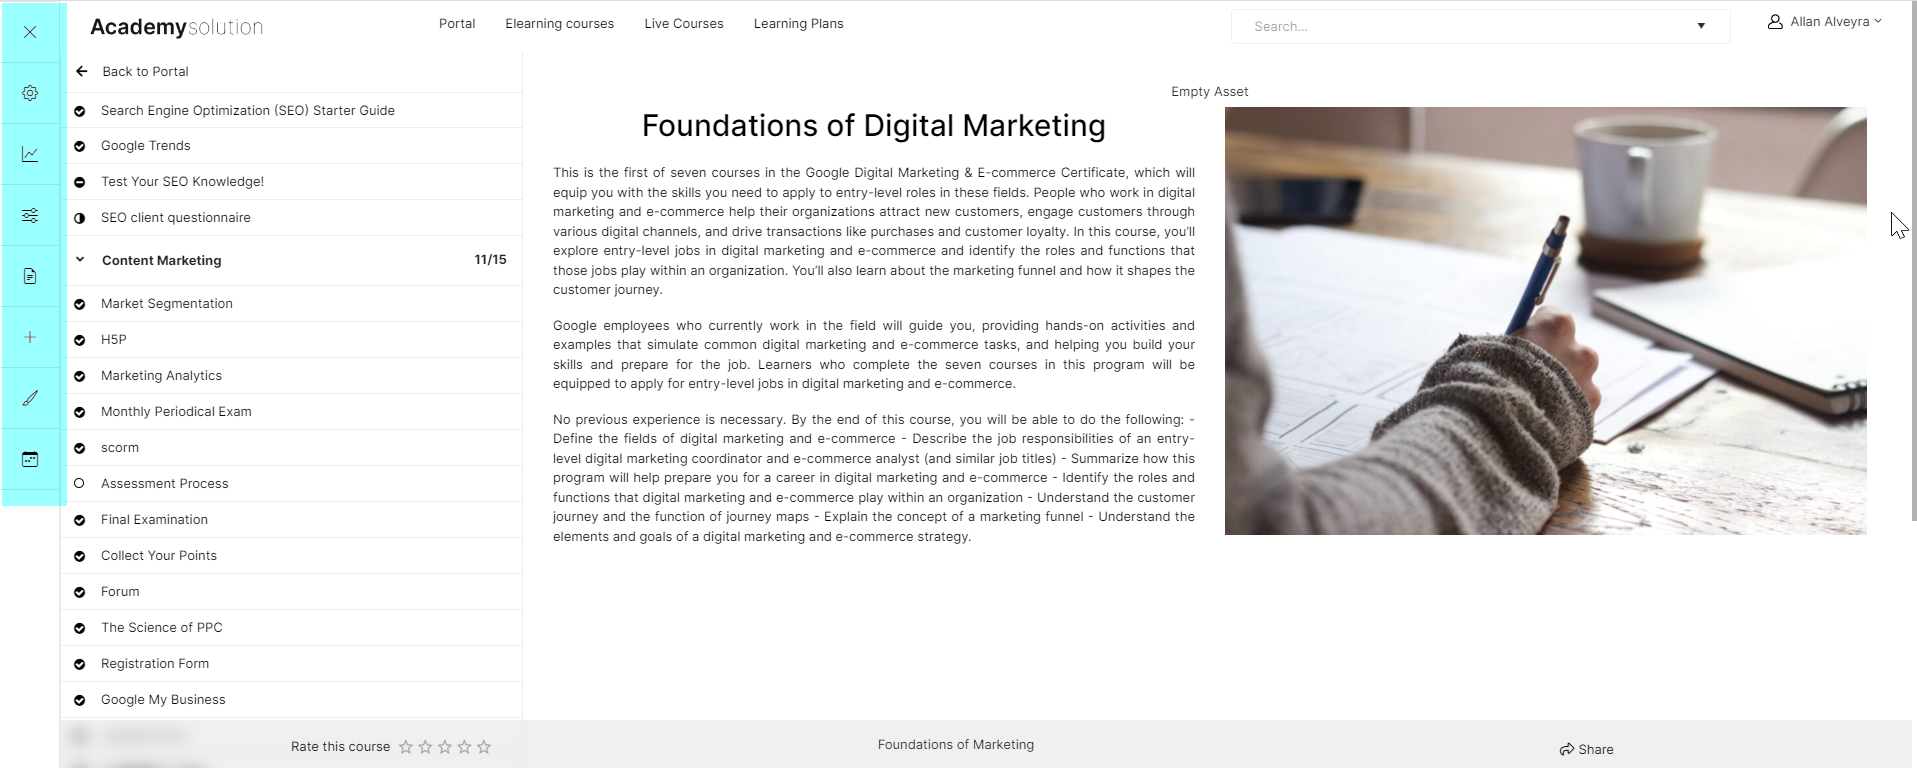
We’re introducing a new tool panel on the client view as part of our continuous effort to make content management more intuitive and hassle-free.

The tool panel does not only give instant access to essential course editing tools. It also gives you greater flexibility when doing and saving quick changes on course content or assets.
This development allows you to change your course directly on client view using functionalities you often see in the Control Panel. Some of the actions you can perform using this feature include:
- Editing assets
- Editing a page
- Applying basic changes to a course via course settings
- Viewing course statistics
- Adding content such as course objectives or a new course
The following are the available assets you can edit using the tool panel:
- Text
- Media
- Task List
- Assessment
- Survey

Expect additional assets to be added in future developments to maximize the tool panel’s functionality fully.
Tool Panel Features
- Control Panel button – access the Control Panel by clicking the gear icon.
- Statistics – clicking this button will provide you with an overview of relevant course statistics, such as the number of course attempts and enrollment, page and user logs, and completion rates.
- Course settings – make basic changes to your course by accessing the course settings in the tool panel. With the course settings, you can:
- Edit the title, description, and status of your course
- Add a background image and a category
- Add course objectives
- Access advanced settings
- Page settings – use this functionality to edit the settings of your page (e.g., title, status, or template). Using these settings, you can also add or map out an existing learning objective.
- Course content – click the Course content button to add more pages and folders.
- Edit assets –edit assets directly on client view by using this feature. Clicking this button gives you the same version of the asset editor in the Control Panel. If you, for instance, want to make changes to your survey asset, you can edit its tile and UI version, add questions, and create a feedback message.
- Sessions – clicking on sessions leads you to the course sessions page. You use this page to organize and plan courses (both physically and online) by creating sessions.
To learn more about its features, read the following articles:
- Editing a course
- Editing a page
- Editing assets
- Adding new pages and folders
- Adding course and course objectives