-
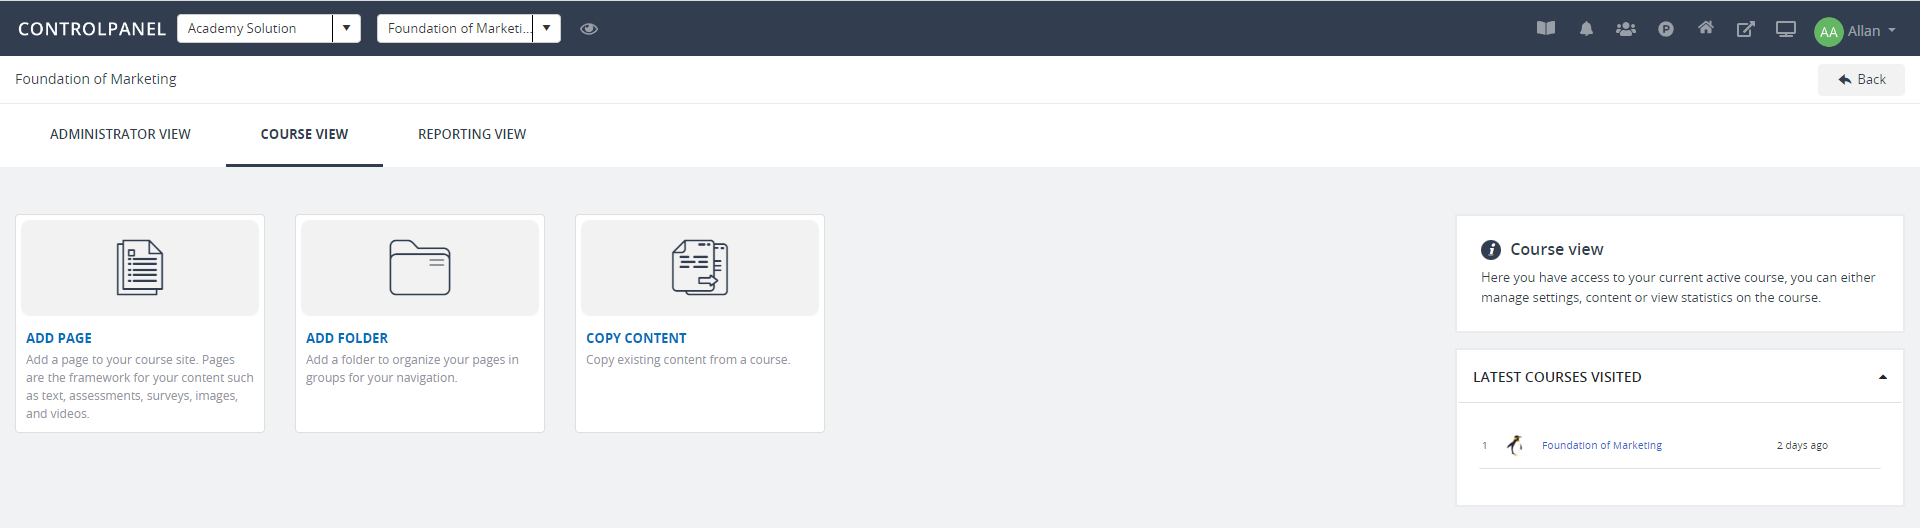
To add a Question pool asset, go to Course view, click Add content, then select Add page.

Note
You can also add content from the homepage of the course by clicking the
Add page 
icon on the menu bar, on the right.
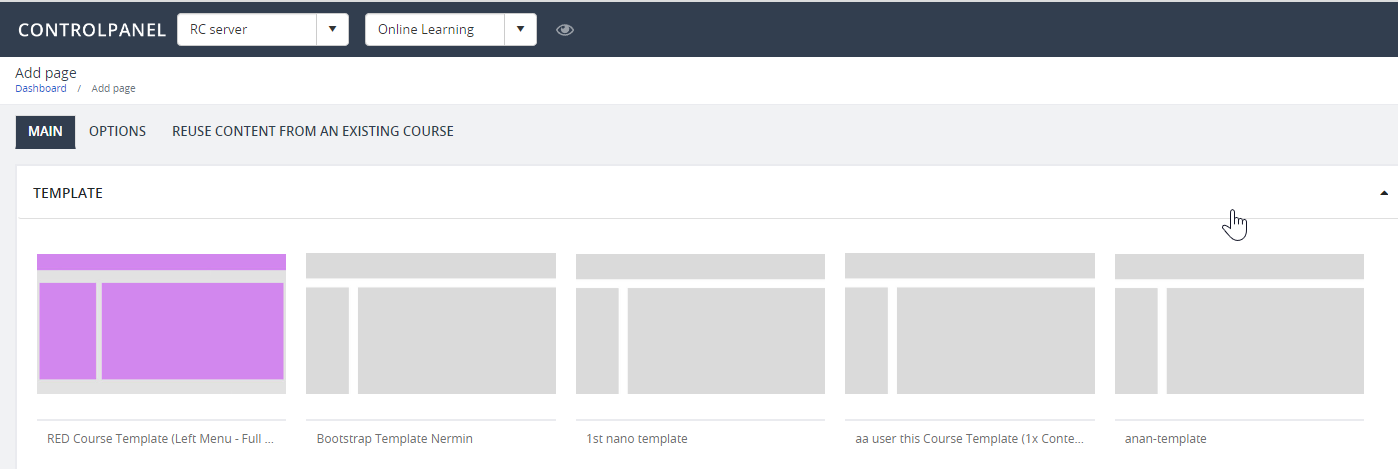
Choose a ready-made template that contains the Assessment/Question Pool slide type.
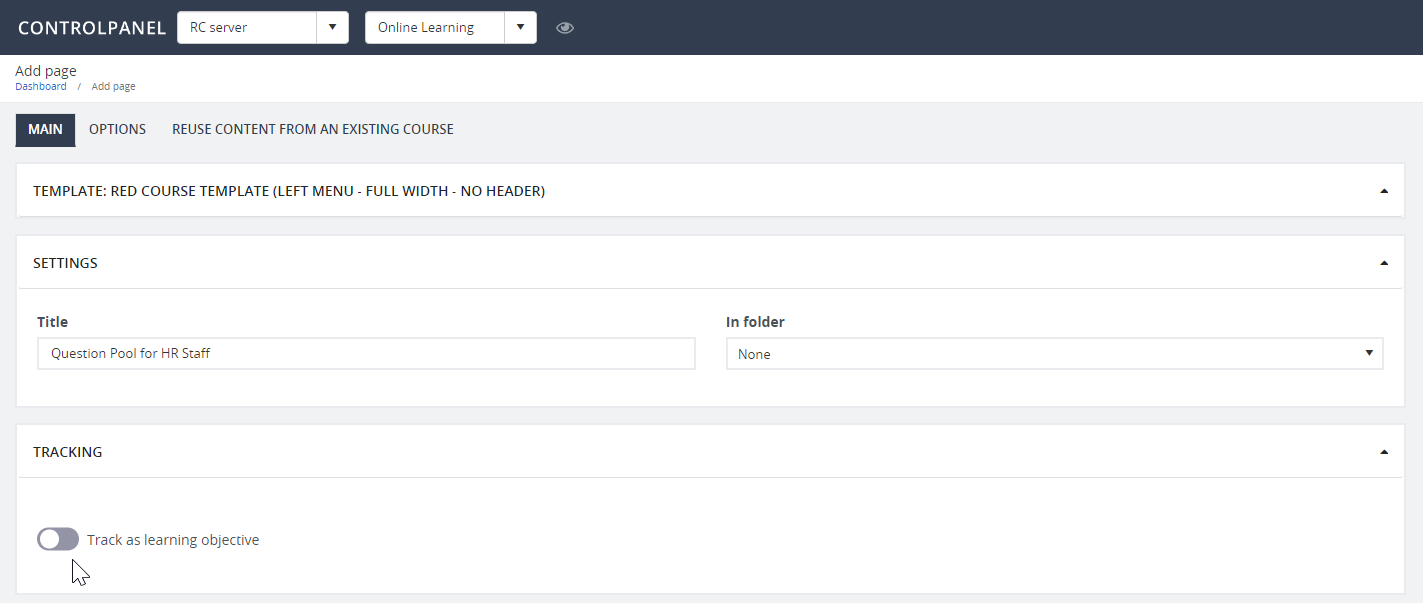
- On the following page, input all the necessary details: title, URL prefix, URL name, and description.
- To track the page as a learning objective, enable Track as learning objective. Click Save.
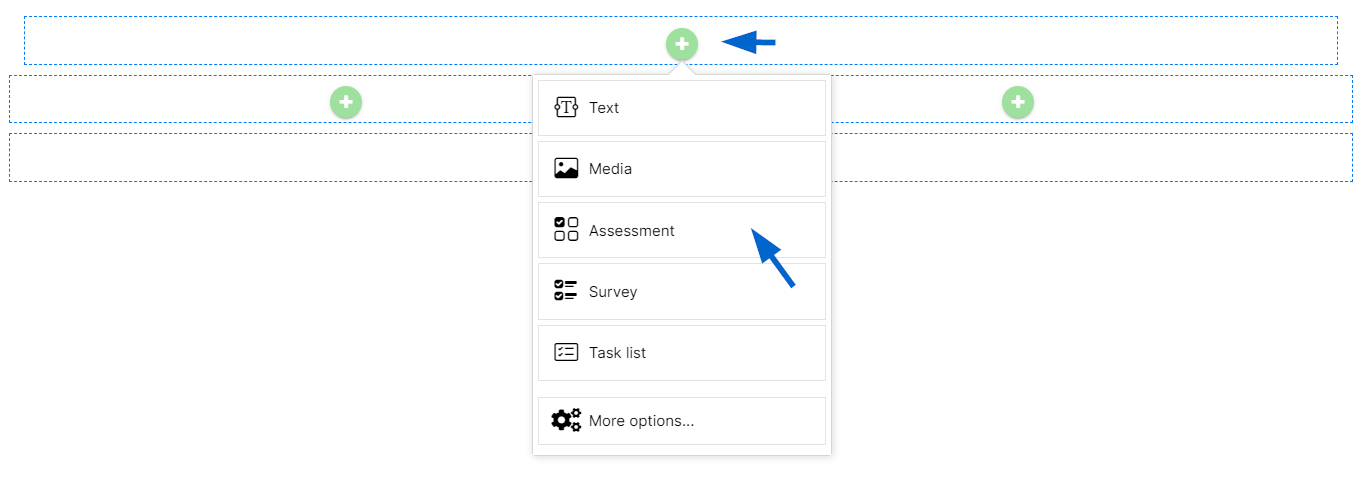
- Upon saving, add an asset by clicking a + sign on the page. Select Assessment.
5. On the following page, specify the Assessment type, for example, Student-paced.
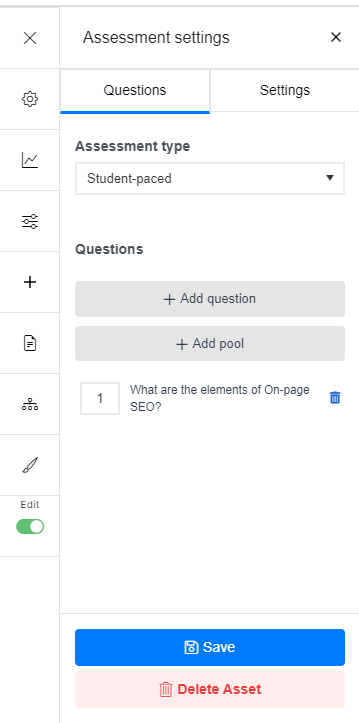
6. Click Add question and select a question type, for example, Multiple Choice.
7. On the Assessment question editor, enter the question and its corresponding choices, and then click Save.
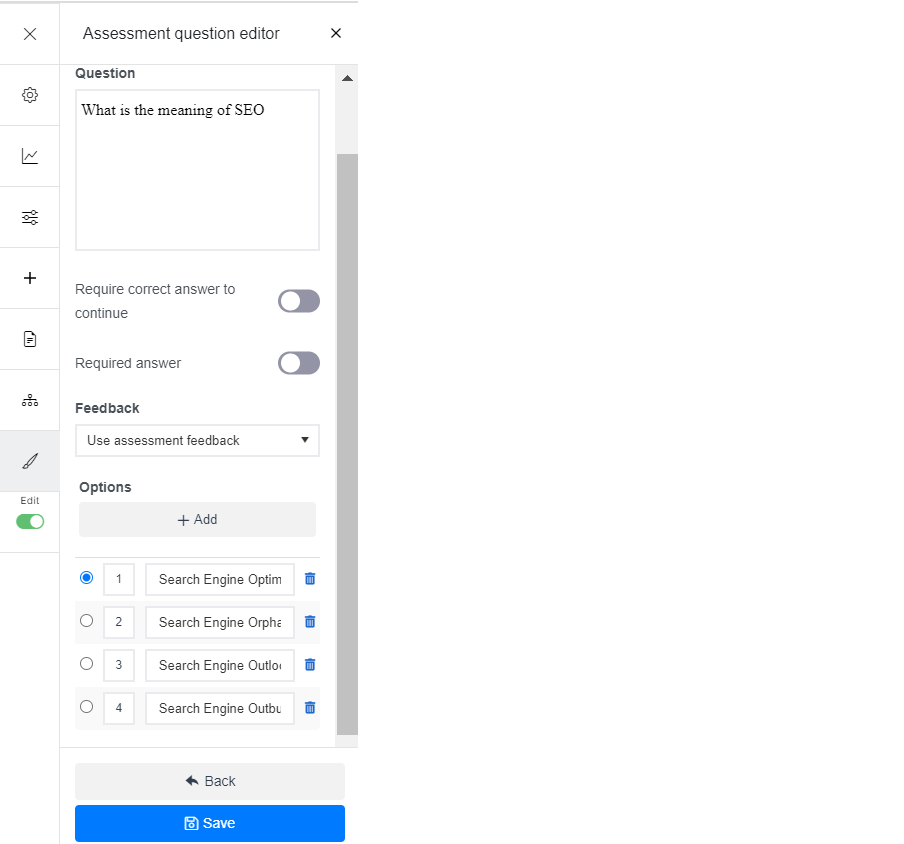
8. Enabling the "Require correct answer to continue" button will prompt users to enter the correct answer to successfully proceed with the next question or set of questions. On the other hand, Use the “Required answer” button to create an error message that will prompt the user to supply the necessary answer.
9. If you want to provide users feedback whenever they've answered a question, select an option from the Feedback dropdown list.
- Use assessment feedback – selecting this will automatically show the default message used on the Feedback Page editor.
- Feedback for each answer question – using this option allows you to create and provide feedback for each question. Just make sure to enable the Instant Feedback button on the Options tab (Assessment settings) or Settings on the Inline Editor to use this functionality.
- Feedback on correct and wrong answer – use this to set up feedback on correct and incorrect responses.
Remember to click Save to keep the changes you're implementing.
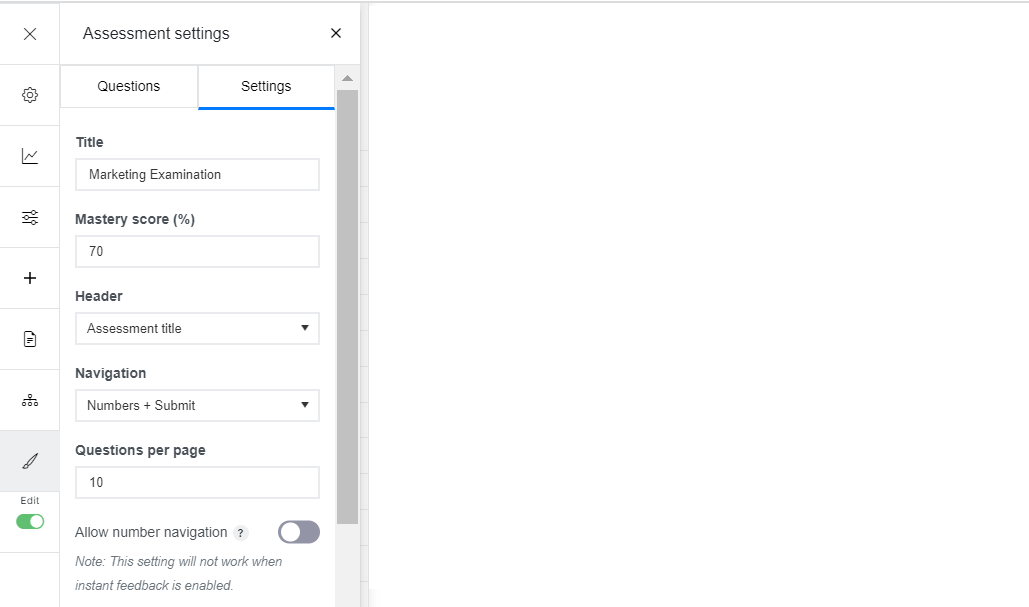
10. When finished creating your questions, go to Settings tab, and specify the Master Score (the percentage users have to score for a pass) and the elements that you want to enable for the test.
If you have multiple questions in your assessment, you want to ensure that users can easily navigate from one question to another. To set navigation instructions, go to Navigation and select one from the dropdown options. Here's how each navigation option would look like on client view:
a. Numbers + Submit

b. Dropdown + Submit

c. X of Y + Submit

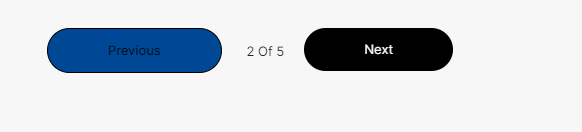
d. Prev. + X of Y + Next
e. Prev. + Numbers + Next

f. Percentage

g. Submit only
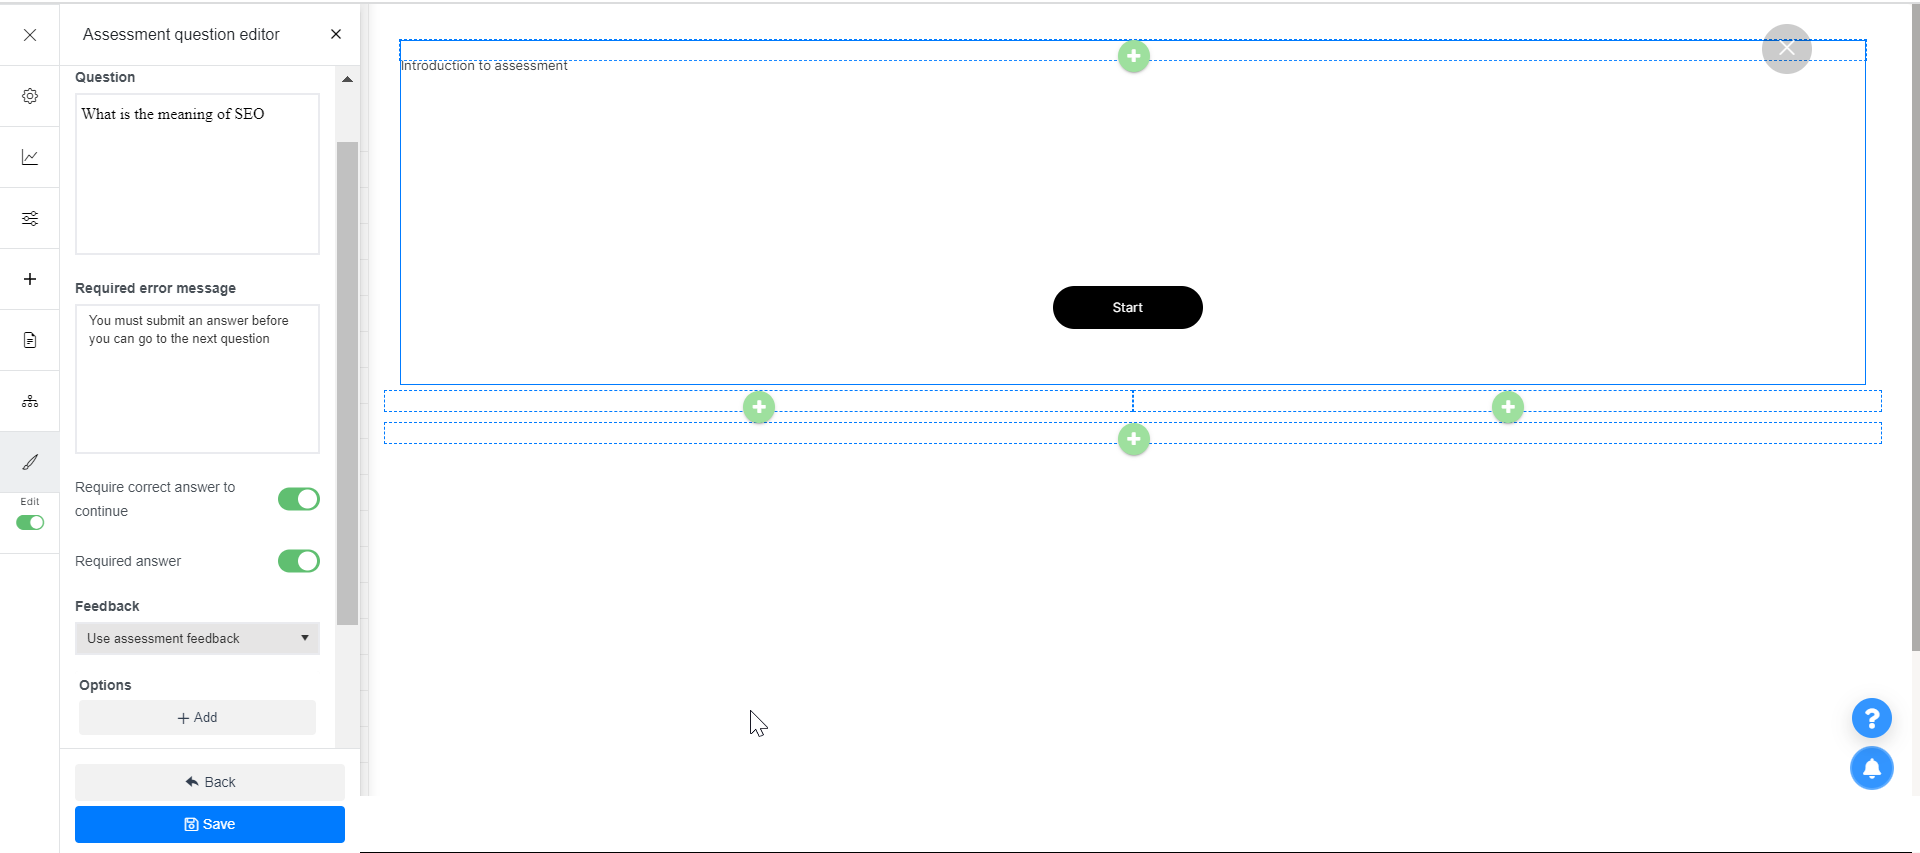
11. The question pool asset also includes settings that allow you to display specific data or instructions you can show before or after the assessment is taken. These data may contain a summary of the assessment result, feedback on assessment completion, or an introductory message of what the assessment covers.
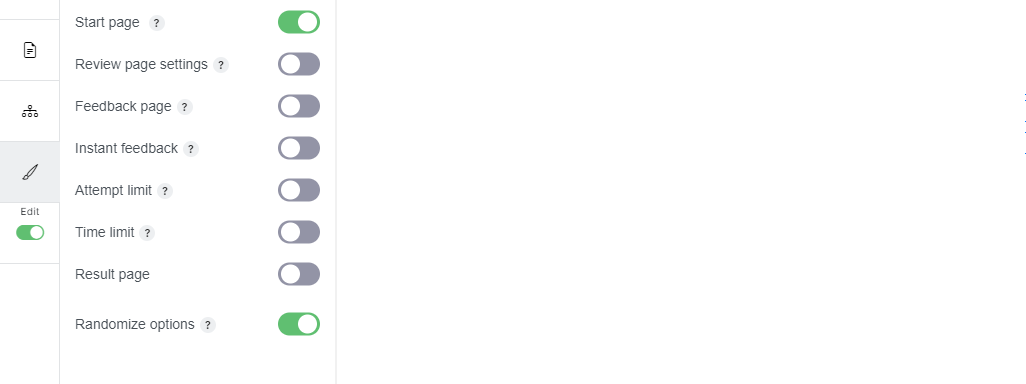
For each of these options, click the appropriate tab to specify how you want them to be displayed:
- Start Page - enable this button to enter the text that you want users to see as an introduction to the test, for example, you can inform users of the duration and whether there is a time limit assigned to the test.
- Review Page Settings - enable this button to enter the text that you want to display when users have completed the test.
- Feedback Page - turn this on to enter the text that you want to display when users pass or fail the test. If you want to include their score, use the format Score: $$Score.
- Instant Feedback - enable this button if you want to inform users whether their answers are correct before they submit them. (Note: When enabled, clicking "Continue" after picking an answer doesn't trigger the system yet to record your response. You still need to click the "Submit" button.)
- Attempt Limit - turn this on to set a limit to the number of attempts users can answer a question.
- Time Limit - enable this button to set a time limit on a test.
12.. Save the test to return to the client view.