Add an MP4 File to a Page and Convert to Media Streaming: A Step-by-Step Guide
Updated one year ago /
2 min read
Videos are a powerful way to engage audiences and enhance content delivery. If you need to upload an MP4 file using the Control Panel and convert it for media streaming, this guide provides clear, step-by-step instructions to ensure a seamless process. Follow along as we walk you through accessing the upload section and verifying that it is properly stored and playable across devices.
Prerequisites
- Supported File Format & Size
- The file must be in MP4 format.
- Verify the file size limit allowed by the system for smooth uploading.
- Course and Folder Setup
- Identify the correct course and folder where the media asset should be stored for proper organization.
- Ensure the course is active and not restricted from modifications.
- System Settings
- The Media Streaming Service must be enabled within the platform settings.
- Ensure that "Upload and queue any video for streaming services" is toggled ON to convert the MP4 to Media Streaming.
Steps:
- Navigate to the correct course where you want to add the MP4 file.
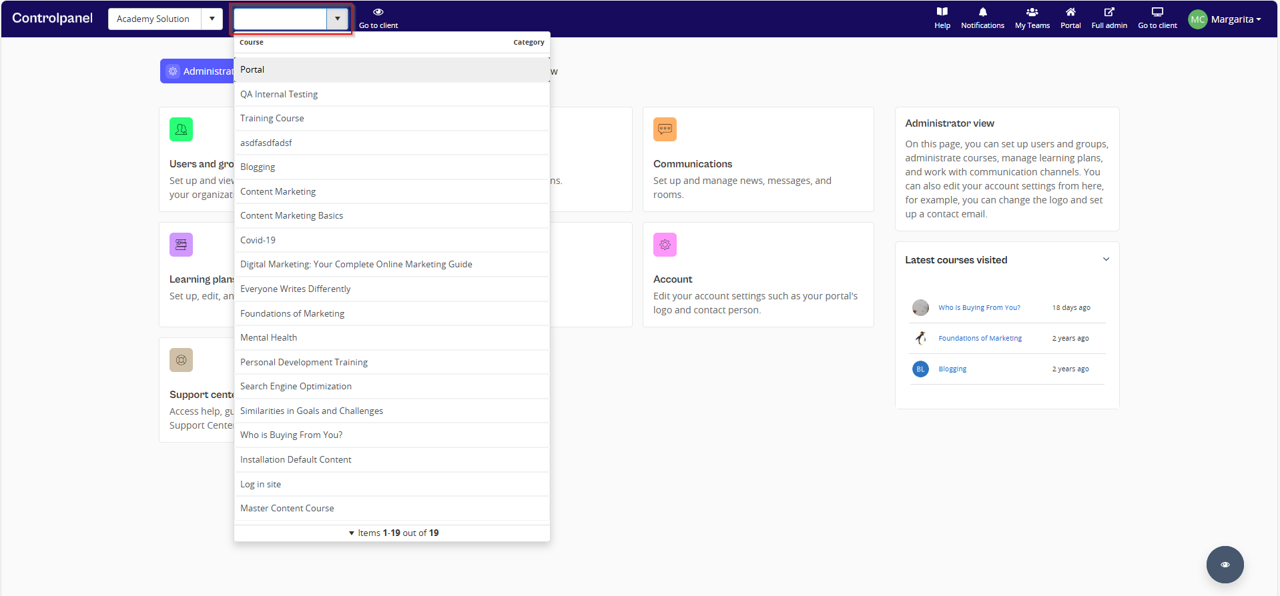
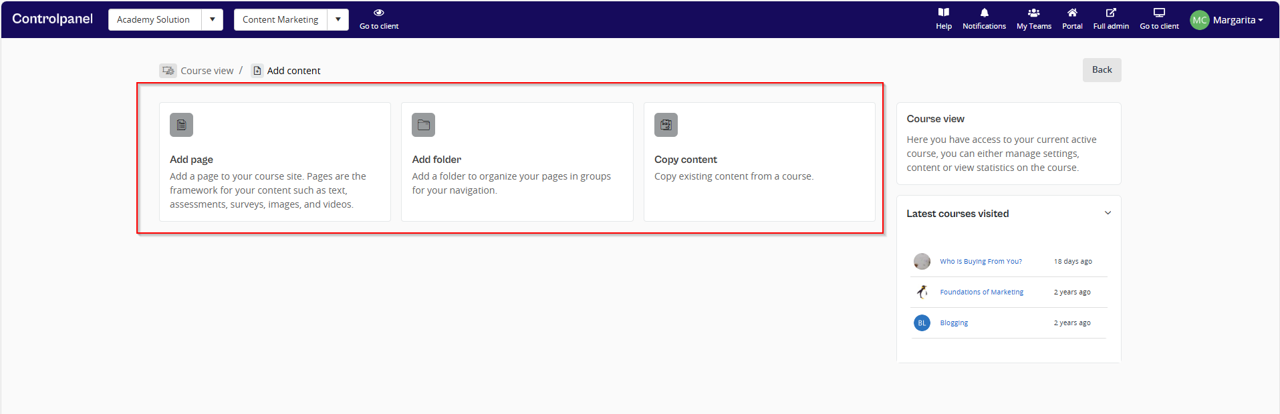
- In the Control Panel, go to Course View and click Add Content.
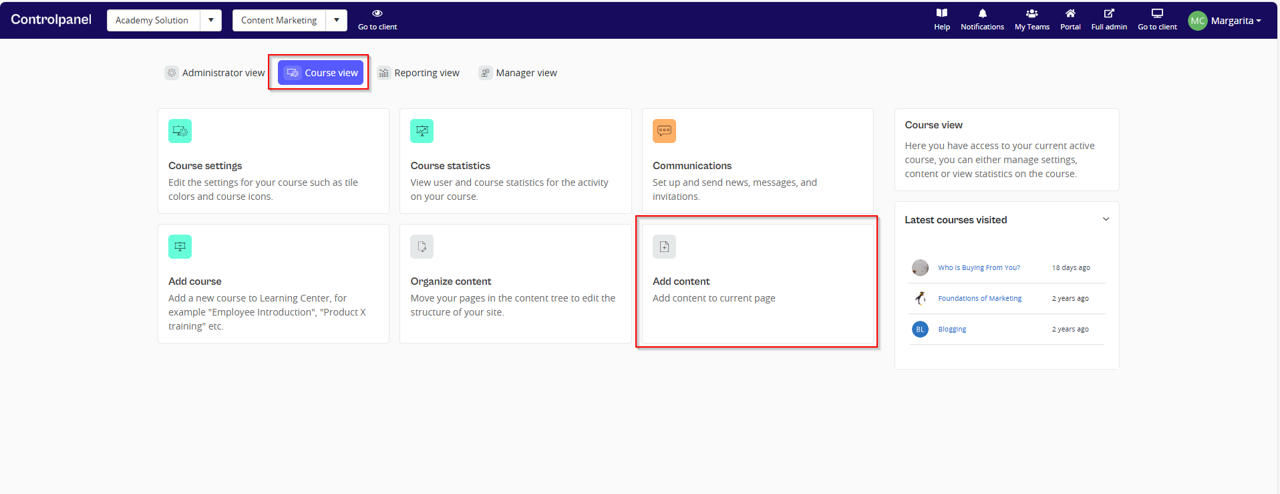
- Choose from the three available content types and select the one that best fits your needs i.e. Add page.
- Select the desired template for your content.

- Under the Main and Options tabs, provide the necessary information, configure the required settings as mentioned below, and click Save.
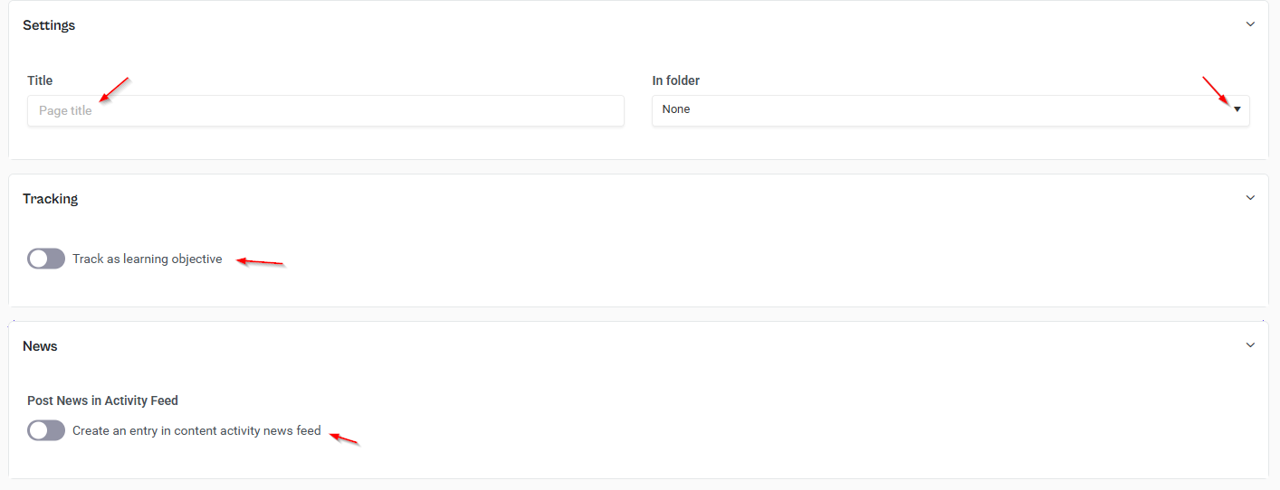
- Main Tab:
- Enter you preferred Page Title.
- Choose a folder for better organization and grouping.
- Toggle on the “Track as learning objective” if applicable.
- Toggle on “Create an entry in content activity news feed” to add an entry to the news feed.
- Layout:
- Set the layout of your page by selecting or uploading an icon and background image (optional but enhances aesthetics and personalization).
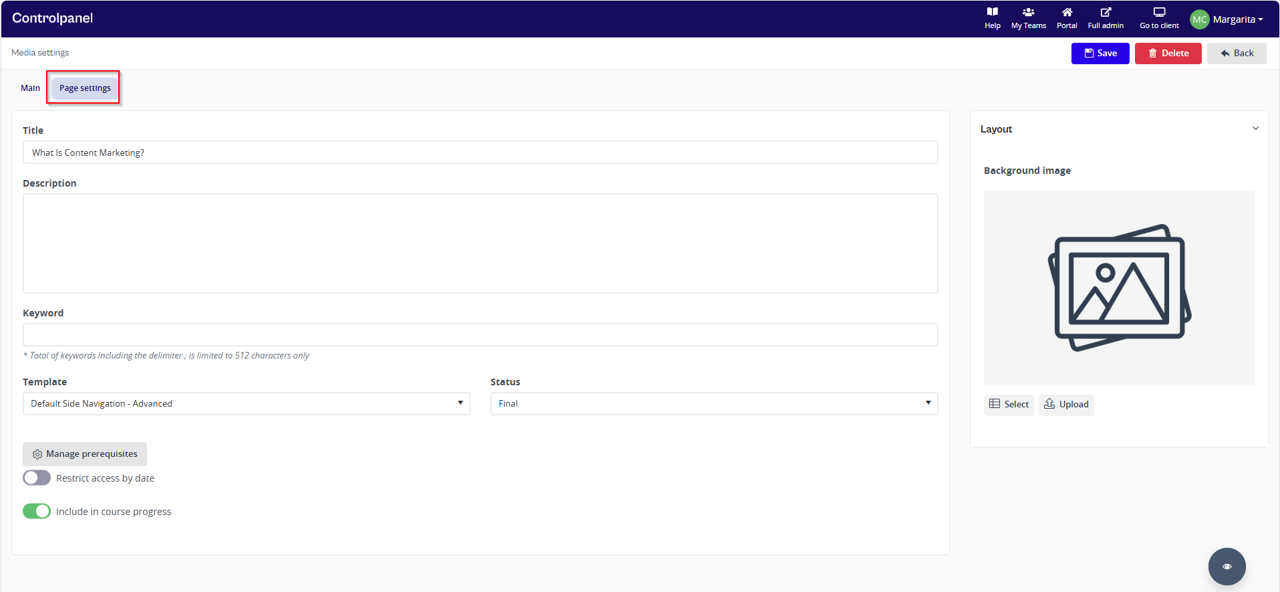
- Options:
- Provide the description, keywords, and select status (either draft or final).
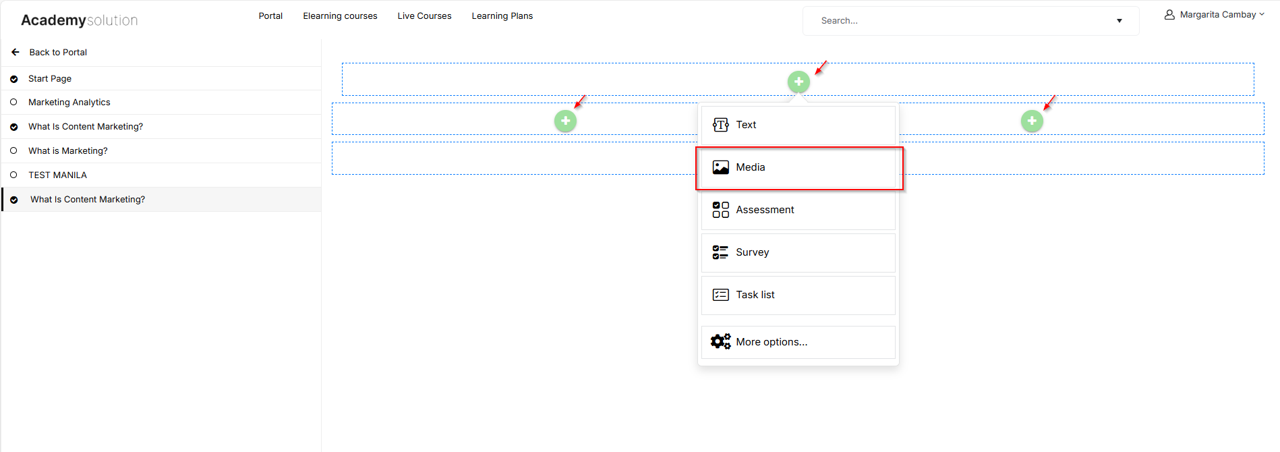
- In the next page, click any of the '+' icon and then select Media.
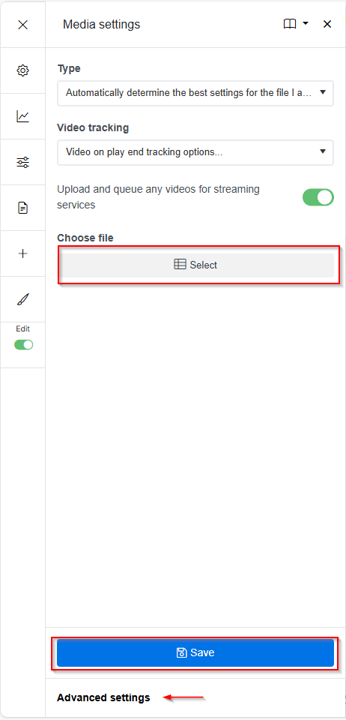
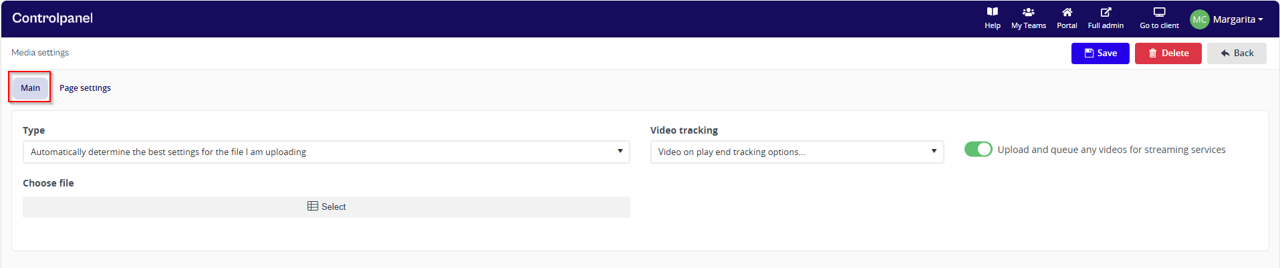
- In Media Settings, select the Type from the dropdown options.
- If left unselected, the system will automatically determine the best settings for the file.
- Enabling "Set status on page to completed on play end" will automatically set the page’s status to "completed" when the video finishes playing.
- Toggle on "Upload and queue any video for streaming services" if you want to convert the MP4 to Media Streaming. Refer to the step-by-step guide below for detailed instructions.
- Enabling "Set status on page to completed on play end + track towards course completed" allows sharing to another domain(s).
- Click Select to upload your MP4, then click Save or navigate to Advanced Settings, which will take you back to the Control Panel. You can change the settings you've set earlier under the Main and Page Settings tabs, and access additional functionalities for editing your media asset. For example:
- Set the lifespan
- Manage prerequisites
- Include in Course progress
- Select the Required course attempt status to make visible (e.g., completed, passed, or attended)
- Toggle on "Show only for users belonging to a course session"
- Create or map to existing Learning Objectives
Choose the option that best suits your content flow and user experience.
Expected Outcome:
Once completed, the MP4 file is successfully uploaded, accessible, and fully functional within the system, ensuring an optimized viewing experience for users.
Note: You can easily convert your file using HandBrake, a free and open-source application. HandBrake supports a wide range of formats and offers customization options to ensure optimal quality for your needs. Whether you're converting files for specific devices or reducing file size, HandBrake is a reliable and user-friendly solution.
How to Convert an MP4 to Media Streaming
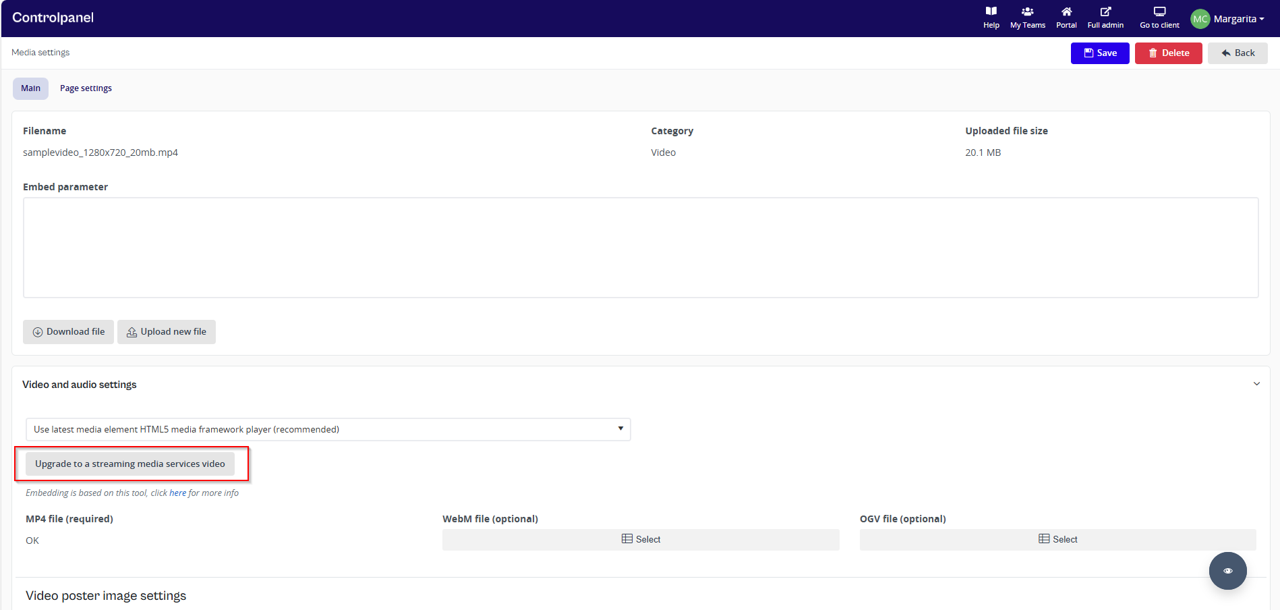
- Find Video and Audio Settings and click "Upgrade to a streaming media services video".
- This will display the option "Start converting the video to a streaming video now".
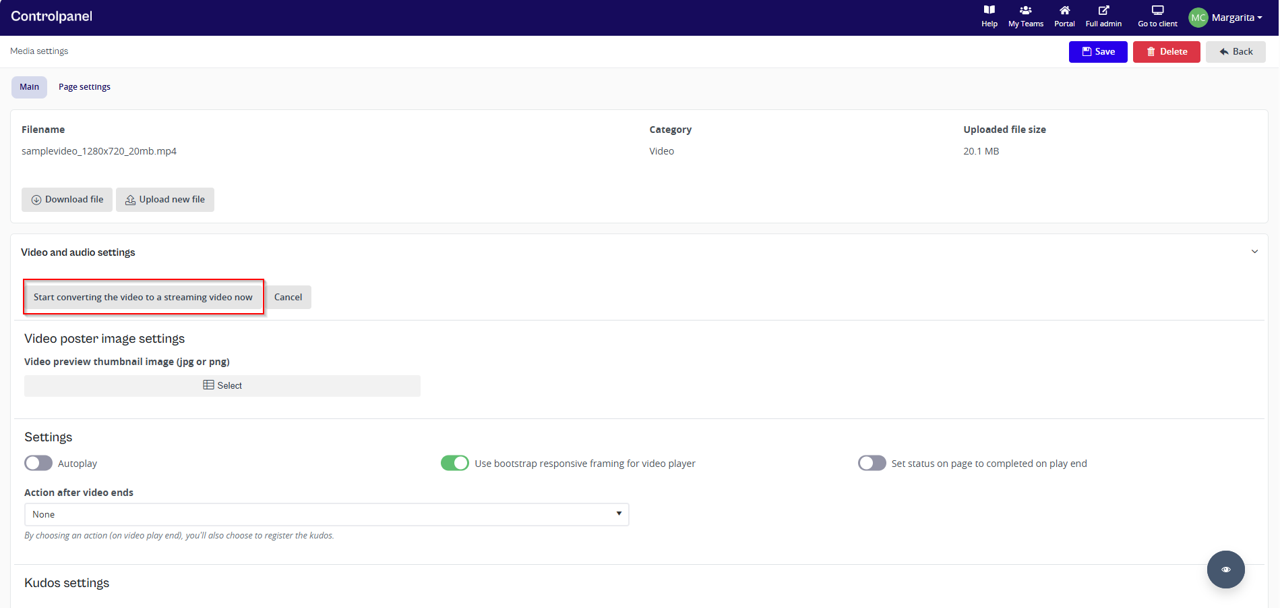
- Click "Start converting the video to a streaming video now".
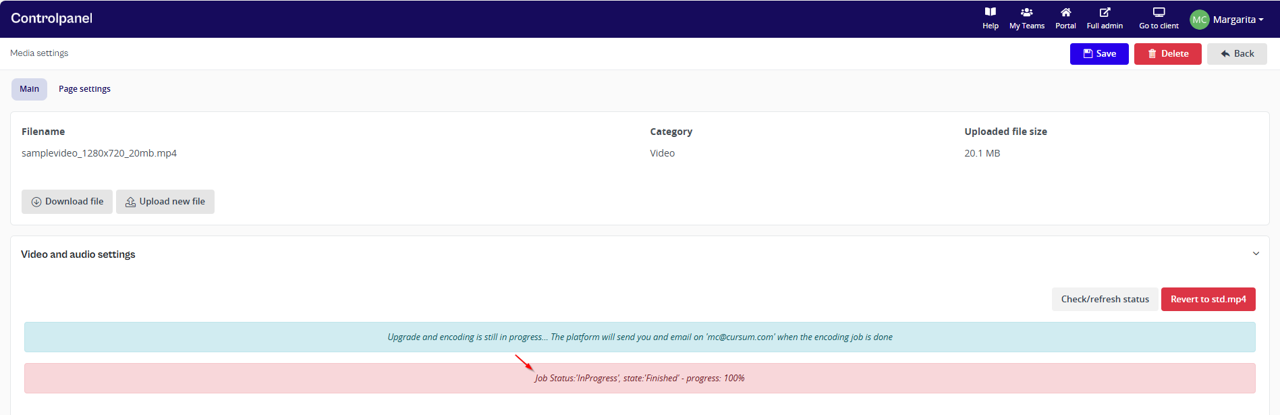
- The system will display the message: "Upgrade and encoding is still in progress. The platform...".
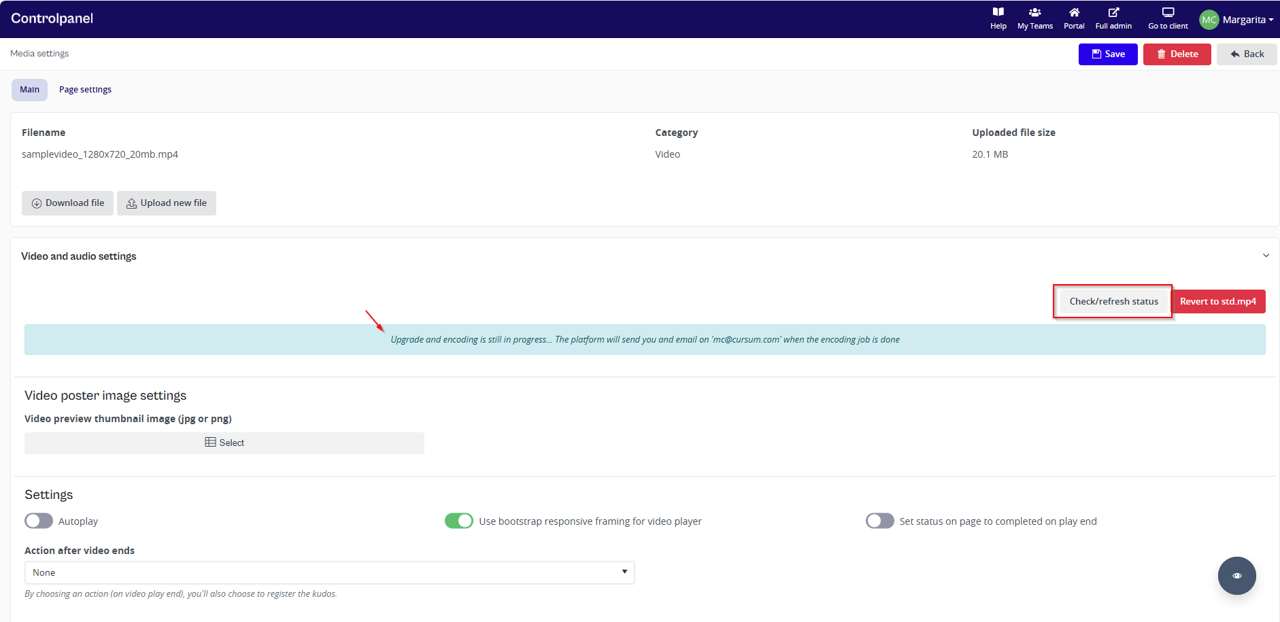
- Depending on the network speed and media file size, the conversion may take some time. Click the "Check/refresh status" button on the right side of the screen.
- The status will show "Job Status: 'In Progress', State: 'Finished' - Progress: 100%" (this means it is still processing).
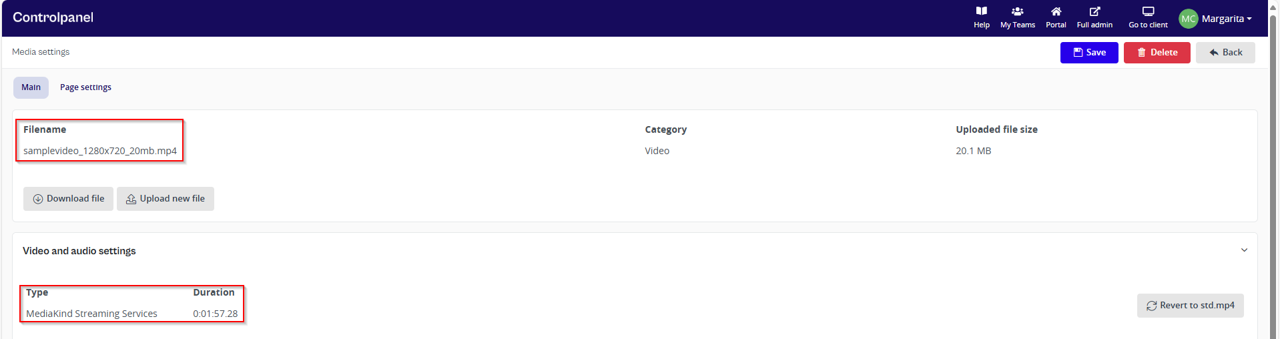
- Once completed, the file name should appear in the Filename panel.
- In Video and Audio Settings, the Type should now display "MediaKind Streaming Services", along with the video's duration.