Organize the structure of a course
Updated 3 years ago /
3 min read
There are two ways to organize your course content:
- You can move your course content into a specific order.
- You can create folders and place your slides in them to group content in a particular “chapter” and keep the navigation menu tidy.
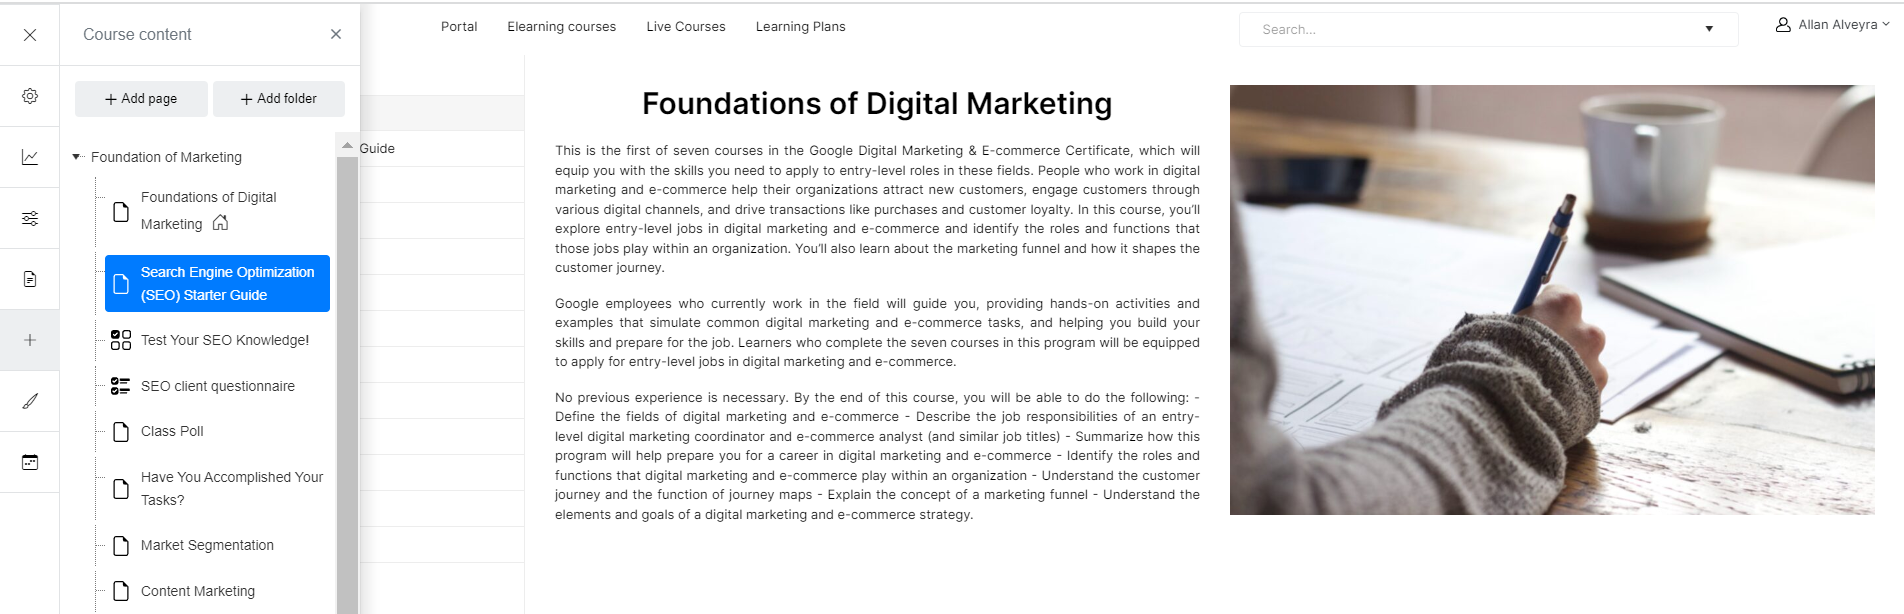
To structure the course content and specify the order of the course navigation, you can drag and drop pages using the Tree view in the tool panel. On client view, click the + icon or the Course content button. Rearrange or move pages by dragging and dropping them on their respective positions.
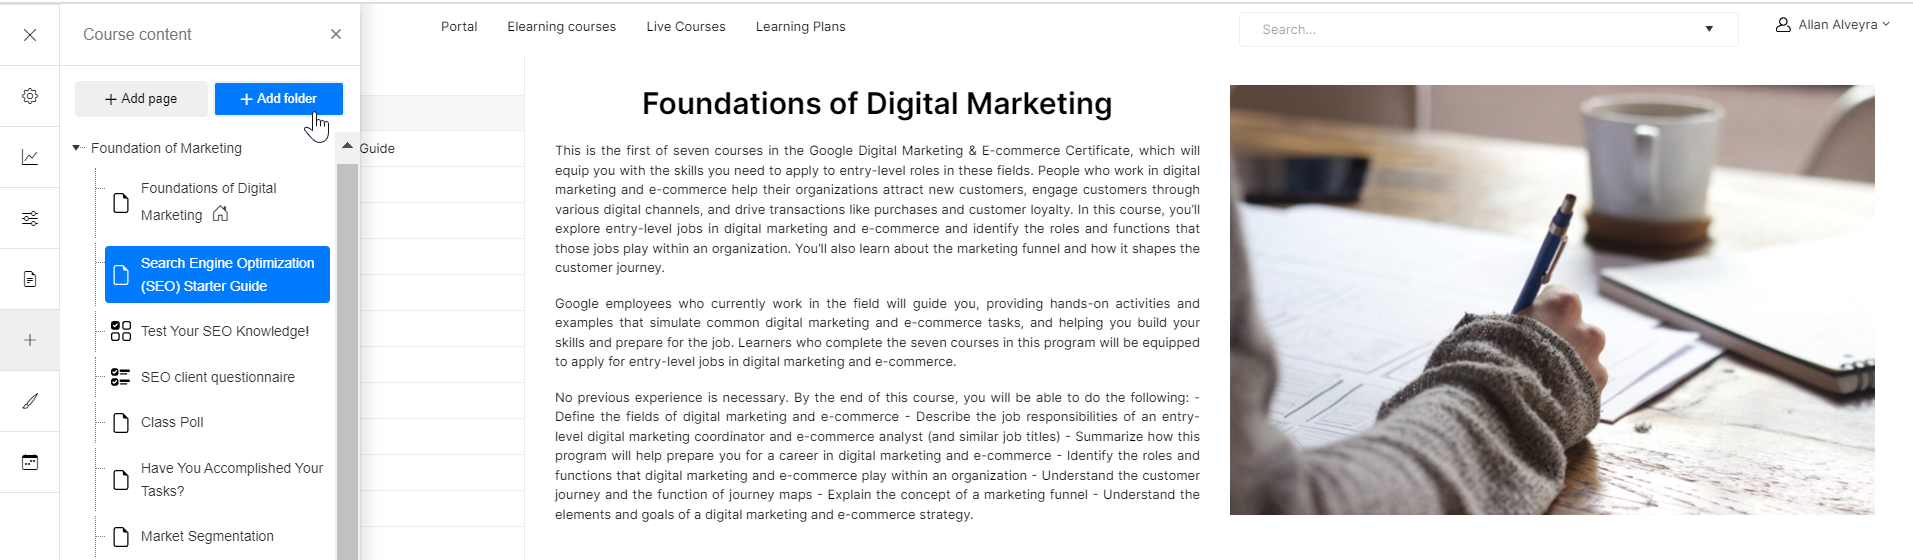
To create a new folder, click the Add folder button in the Course content.
Enter a folder name and select a specific folder type.
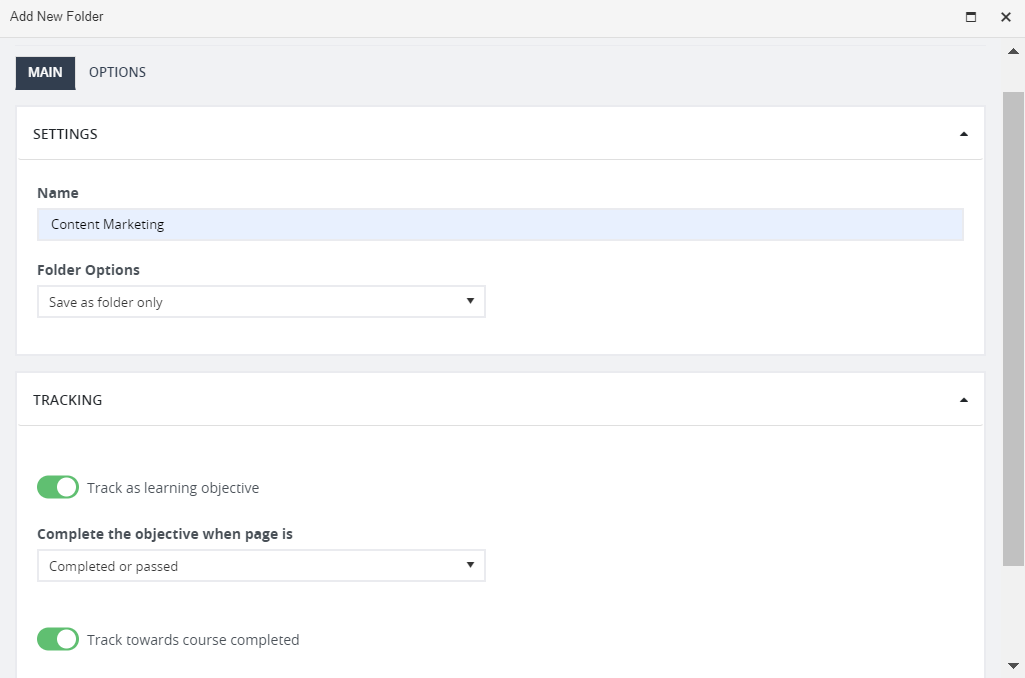
- Save as folder only – an empty folder
- Saves as a folder with content on it – lets you add content like images, texts, etc., which can serve as an introduction or preview to a page or course chapter.
- Save folder with a page inside – lets you add pages directly inside the folder
Again, enabling the Track as learning objective button will make the page a learning objective. Once done, click Save.
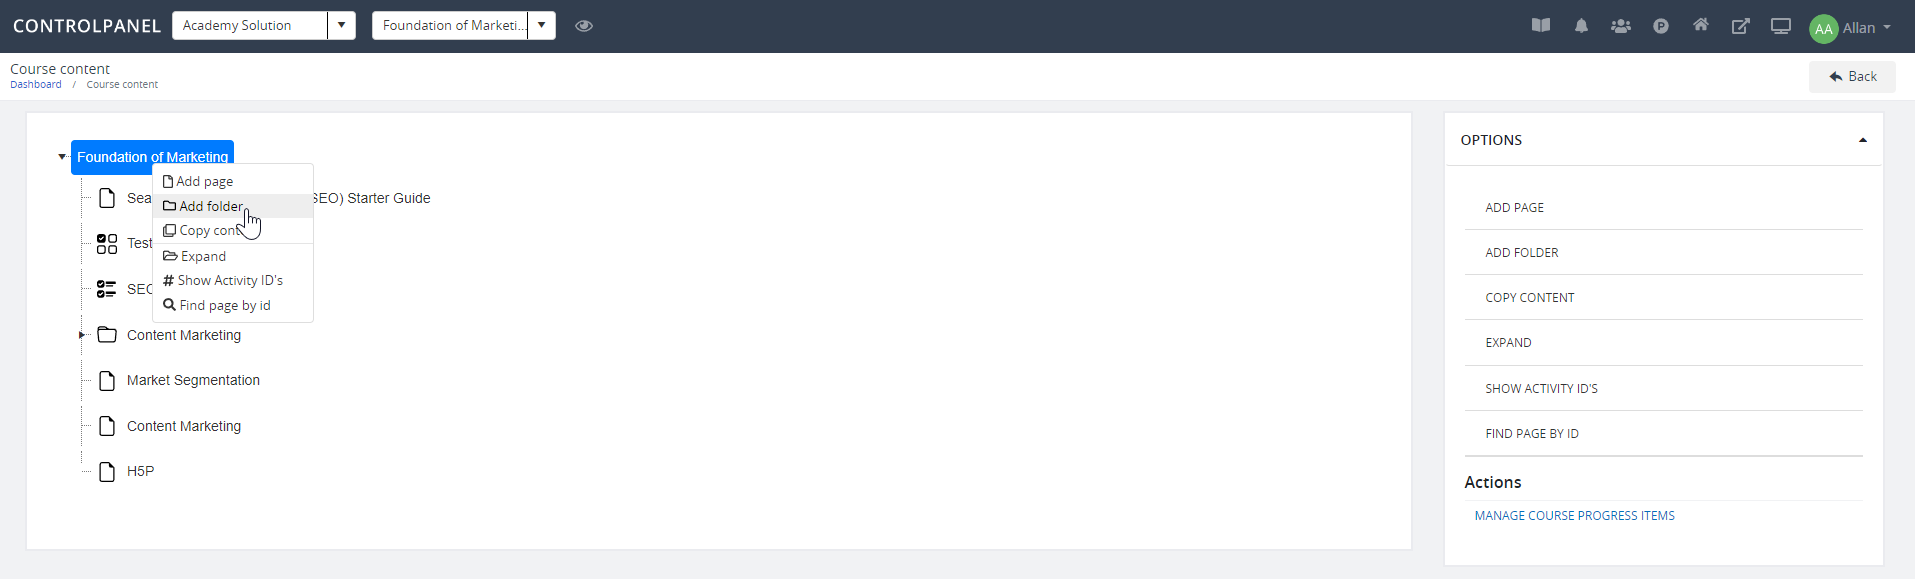
Note: You can also create new folders using the tree view in the Organize content page. Click Organize Content. In the Course Content page, right-click on the Root course, and then select Add folder. The same functionality is available on the sidebar under Options.