Add a new group - Full Admin
Updated 3 years ago /
4 min read
Groups help you to keep track of your users by organizing them in whatever categorization makes sense for you and your company. For example, you can create a group based on a particular location.
There are several ways to create groups:
- Manually
- From a list
- From criteria
Manually create a group
To manually create a group:
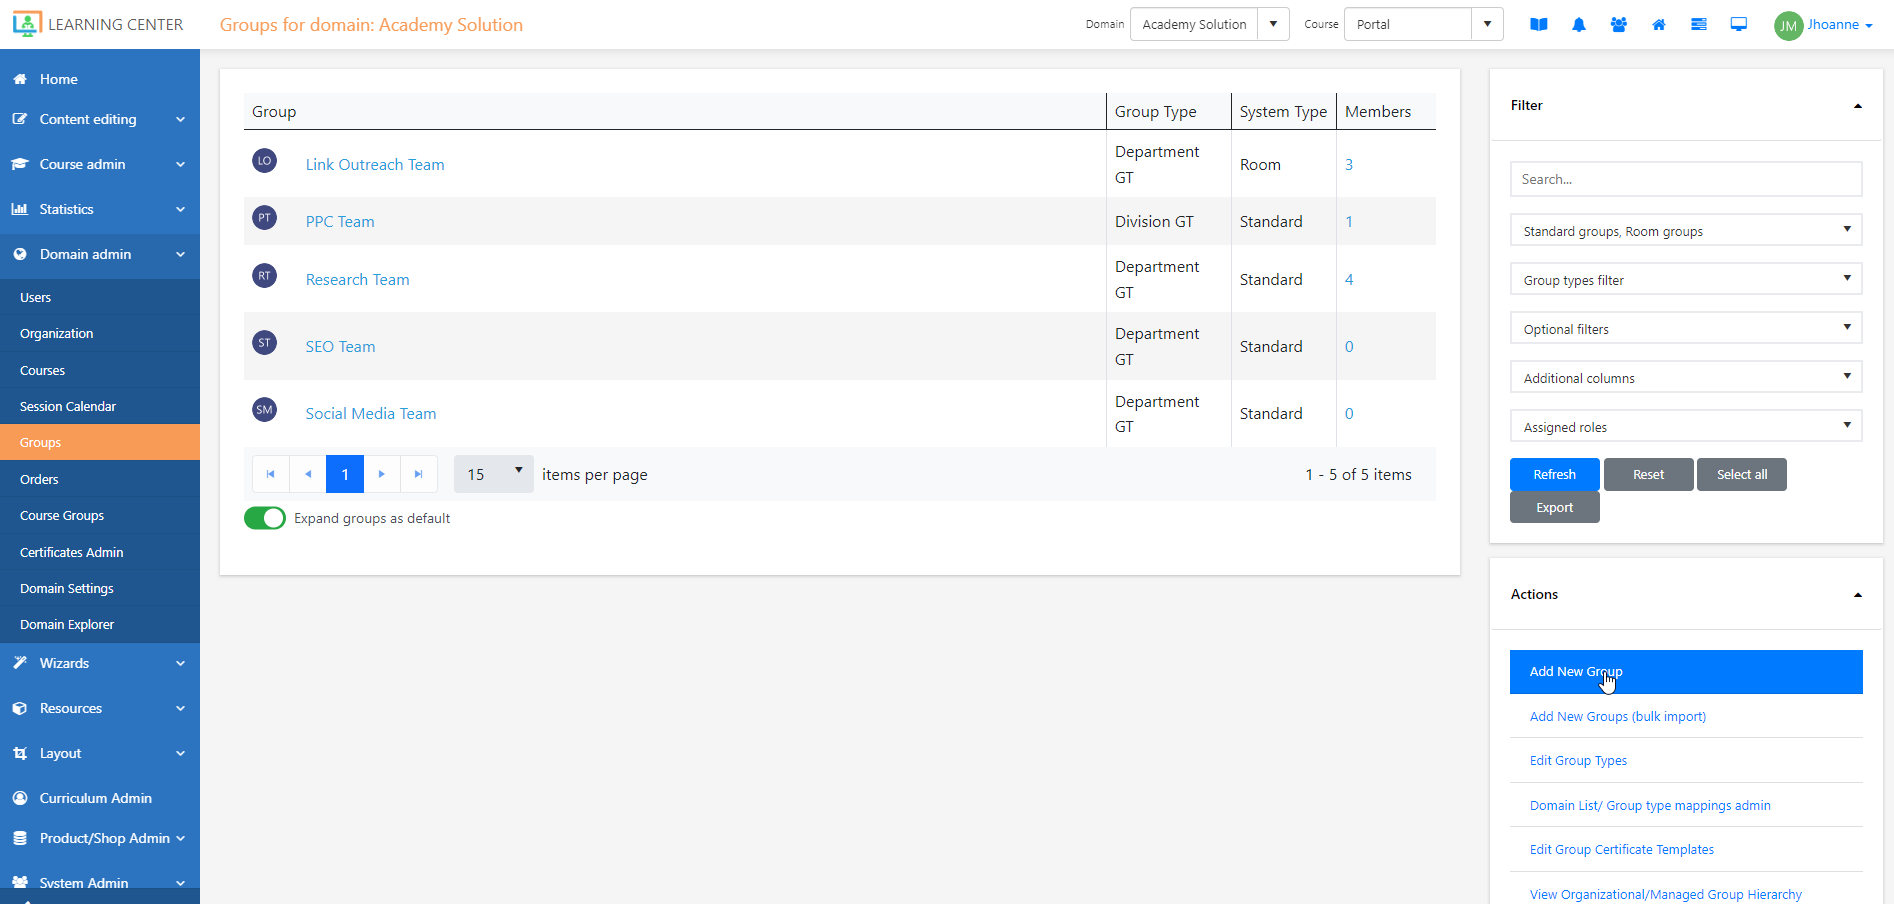
- In Full Admin, click Domain Admin, Groups and on the Groups page, under Actions, click Add new group.
- On the Create new group page, enter a name for the group and in the Group type dropdown, select the type of group, for example, to add a new location to the dropdown list for locations, select the Location Group type – Location GT (Division).

- On the Add/Remove users tab select the users you want to add to your new group.
Create a group from a list
When you import users from an Excel list, you can also choose to create a group from that list. You can also first create a filtered list of your users, export them to an Excel list and then reimport them.
To do this:
- Save your list as a CSV file and in the Control Panel or Full Admin choose Import Users and select the Create a new group checkbox as part of the import process.
Note
This group of users is static - it does not get updated if users subsequently fit the criteria. If you need that sort of group, you have to base your group on criteria, not a list of users. See the following section.
Create a dynamic group based on criteria
You can create a dynamic group that is populated by the system and constantly changes based on the criteria you set up for the group members. For example, you can have a group of managers, that gets updated every time a new manager joins the company or if an employee becomes a manager. To do this:
- In Full Admin, click Domain Admin, Groups and on the Groups page, under Actions, click Add new group.
- Name your group and click Save.
Note
You have to save your group before you can access the Options tab.
- Open the group and on the Options tab, under Advanced settings, click Add users to group based on user criteria (Dynamic group)
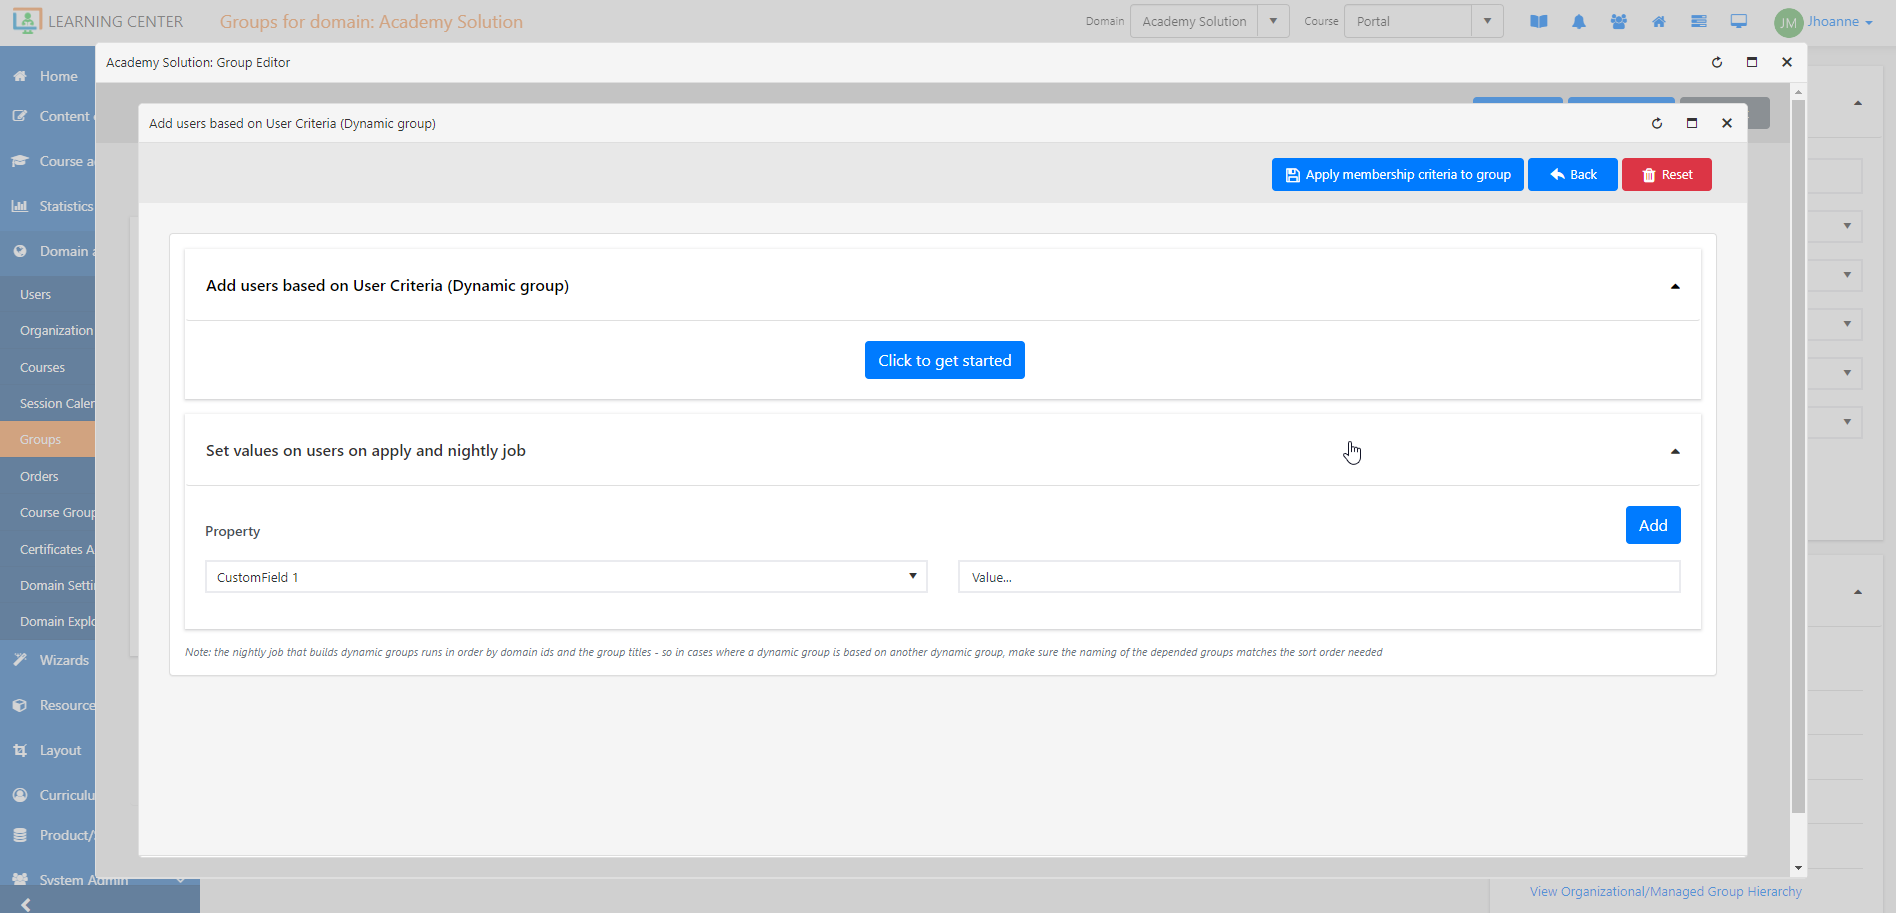
- To add one or a combination of several filters to create the group, in the Add users based on user criteria dialog, specify the combination of filters to create the group and click Add. When you add a filter, you must also specify the SQL operators (AND, OR) under the Existing filters section.
Note
The order that your filters are shown is important - the first one is the one that the other filters are based on. So if you want to combine filters, you must make sure that the combination works. For example, if you want to have a location and two different roles, you must make sure the Location is the first and the two additional filters have OR next to them, which translates as the location and a member of X role or a member of Y role. If you cannot get the main one to show at the top, it can be a good idea to add it several times until it is at the top and then delete the additional ones.
- Click Find now to verify that the group includes the correct users.
- Click Apply membership criteria to group to save the criteria to the group.
Members will be reset every 24 hours, so if your group doesn't have all the right people, you might need to wait a day for it to be updated.
Create a group of all your users
If you want to create an automatically populated group of all your users:
- Follow the steps in the previous procedure and add the Active (User Status) filter.