Office 365 offers the best-in-class productivity apps that come along with powerful cloud services like device and file management, advanced security, and team messaging.
As far as office collaboration is concerned, Microsoft Teams has become a go-to digital hub for most businesses and organizations.
Microsoft teams provide optimum efficiency and convenience, whether to organize video conferences or share essential files among team members.
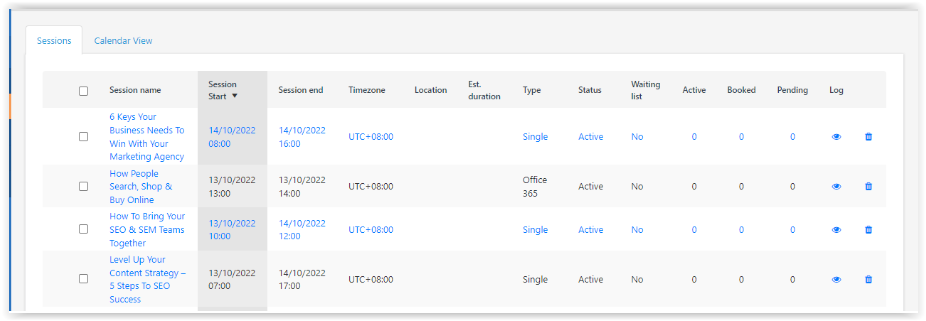
One of the many things that you can do in the Learning Center is to create Course Sessions. Course sessions are instructor-led lessons or meetings which can be held in different intervals.
When you create a course with sessions, you schedule a series of webinars or digital training activities. You can set up your sessions’ start and end date, participants, and location using a calendar type wizard.
While you can specifically set Zoom webinars as a course session type, you can also use Office365 as another option.
To do this, go to Course Admin and select Course Sessions. Click a specific course session.
On the main page, scroll down and look for Session type. And from the dropdown options, select Office 365. When finished, click Save.
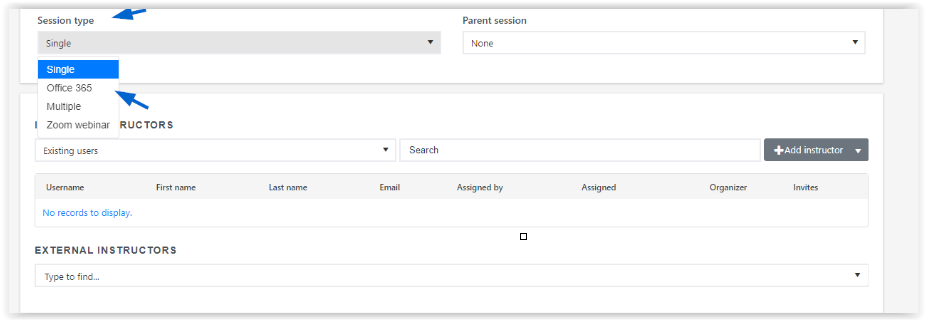
To use its advanced settings, go to the Office 365 tab on the same page. With the advanced settings, you can import attendees from Office 365, require attendee response, create a custom letter for session invite, and more.