How to assign users to a course on the course settings page
Updated 3 years ago /
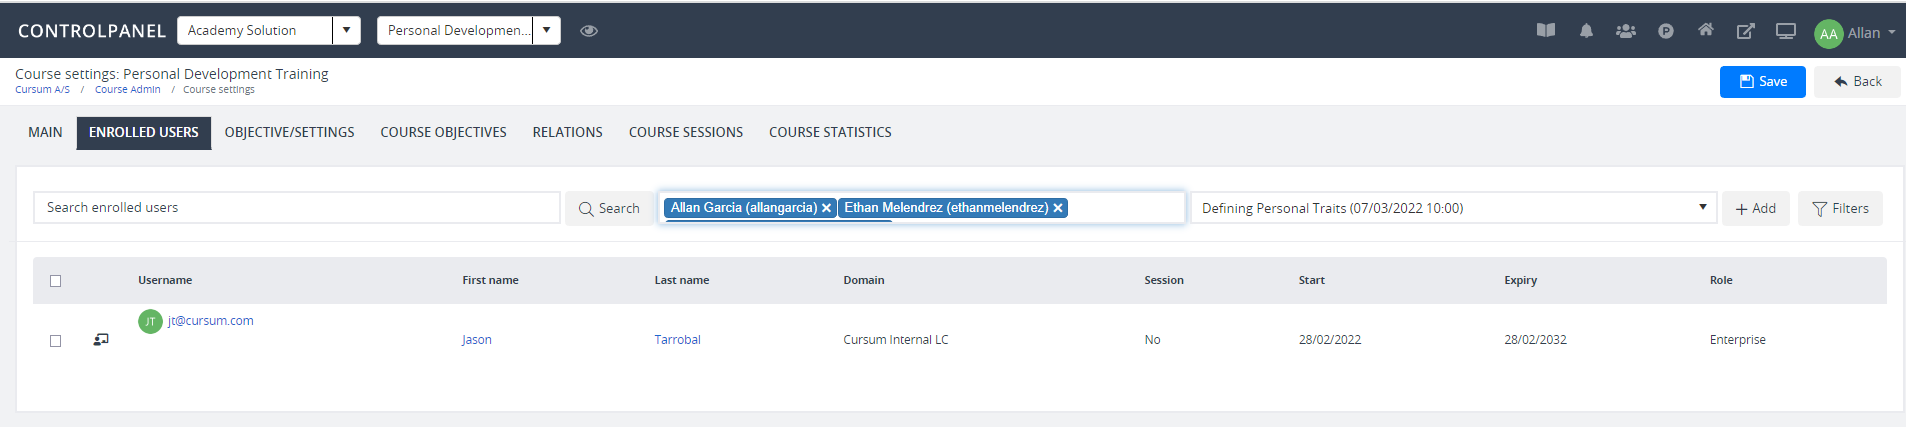
Users can be added to a course directly from the course settings page. To add a user, go to the Enrolled users tab on Course settings. Enter a username on the search box to select a specific user. And then click Add.
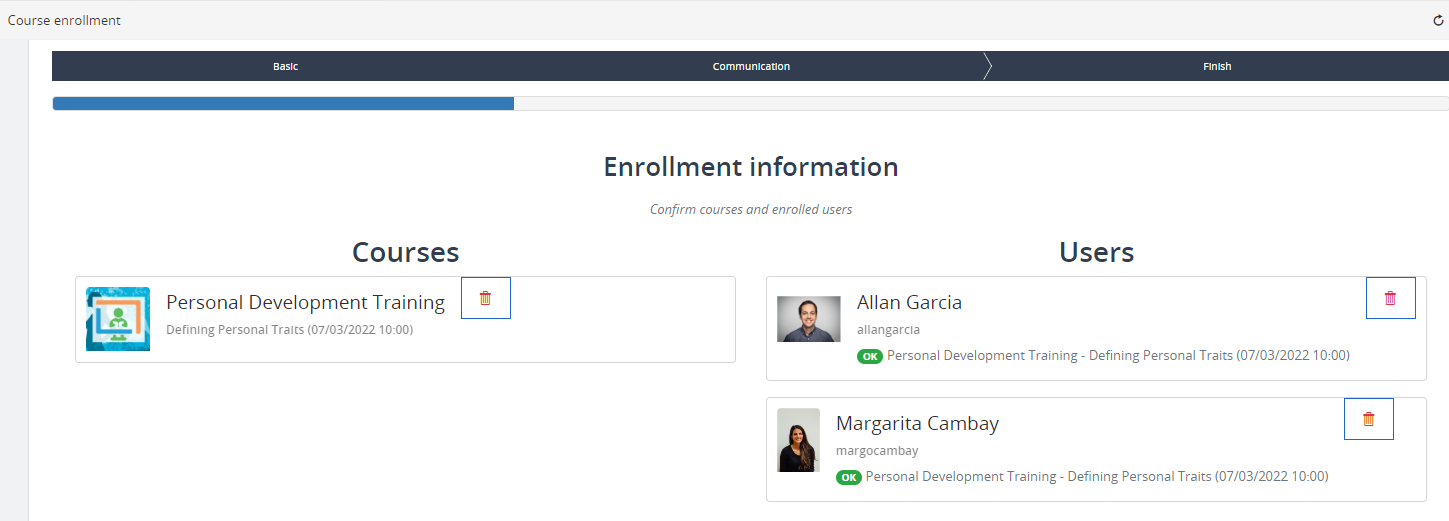
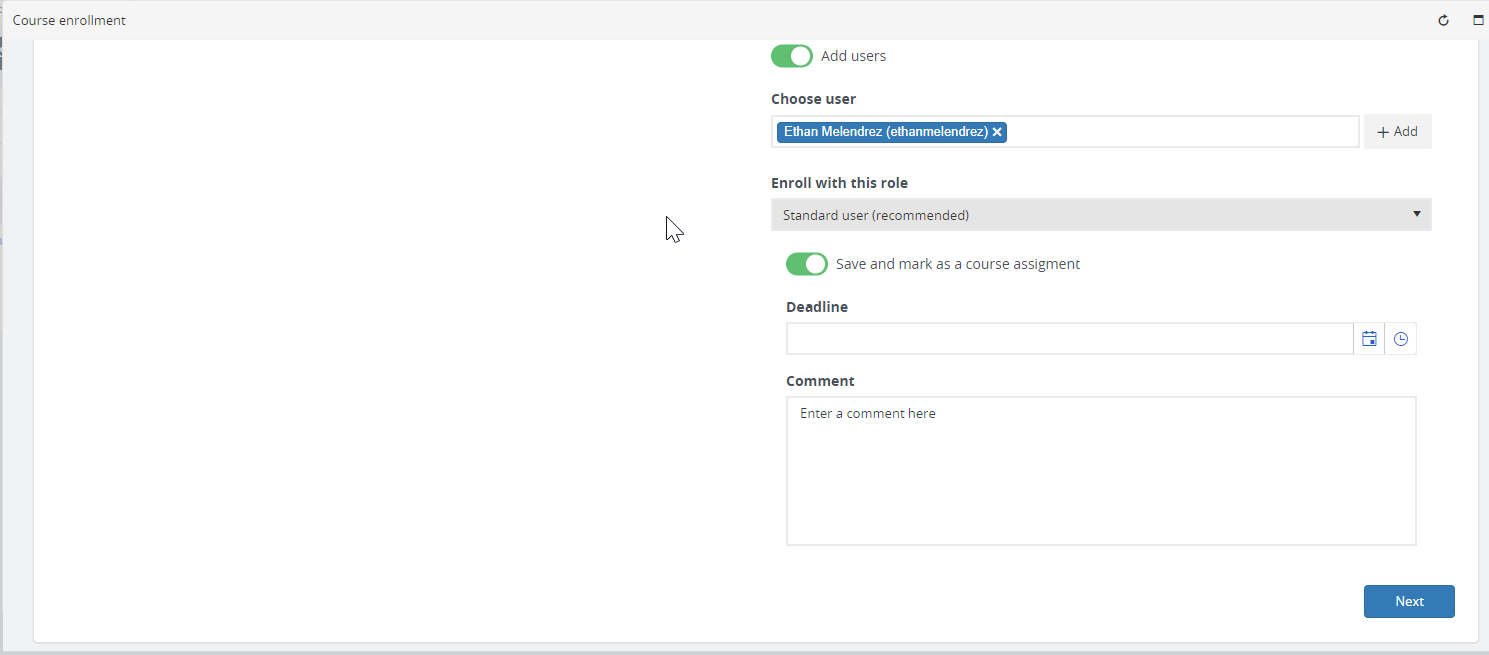
On the popup, you have the option to add another course to a user or vice versa. You can also assign or define a specific role (e.g., Course Reviewer) to the user you’re about to enroll. To continue, click Next.
Note: In case you suddenly decided to add more members, enable the button Add users. Under Choose user, enter the username/s you wish to add. Click Add to finish the process.
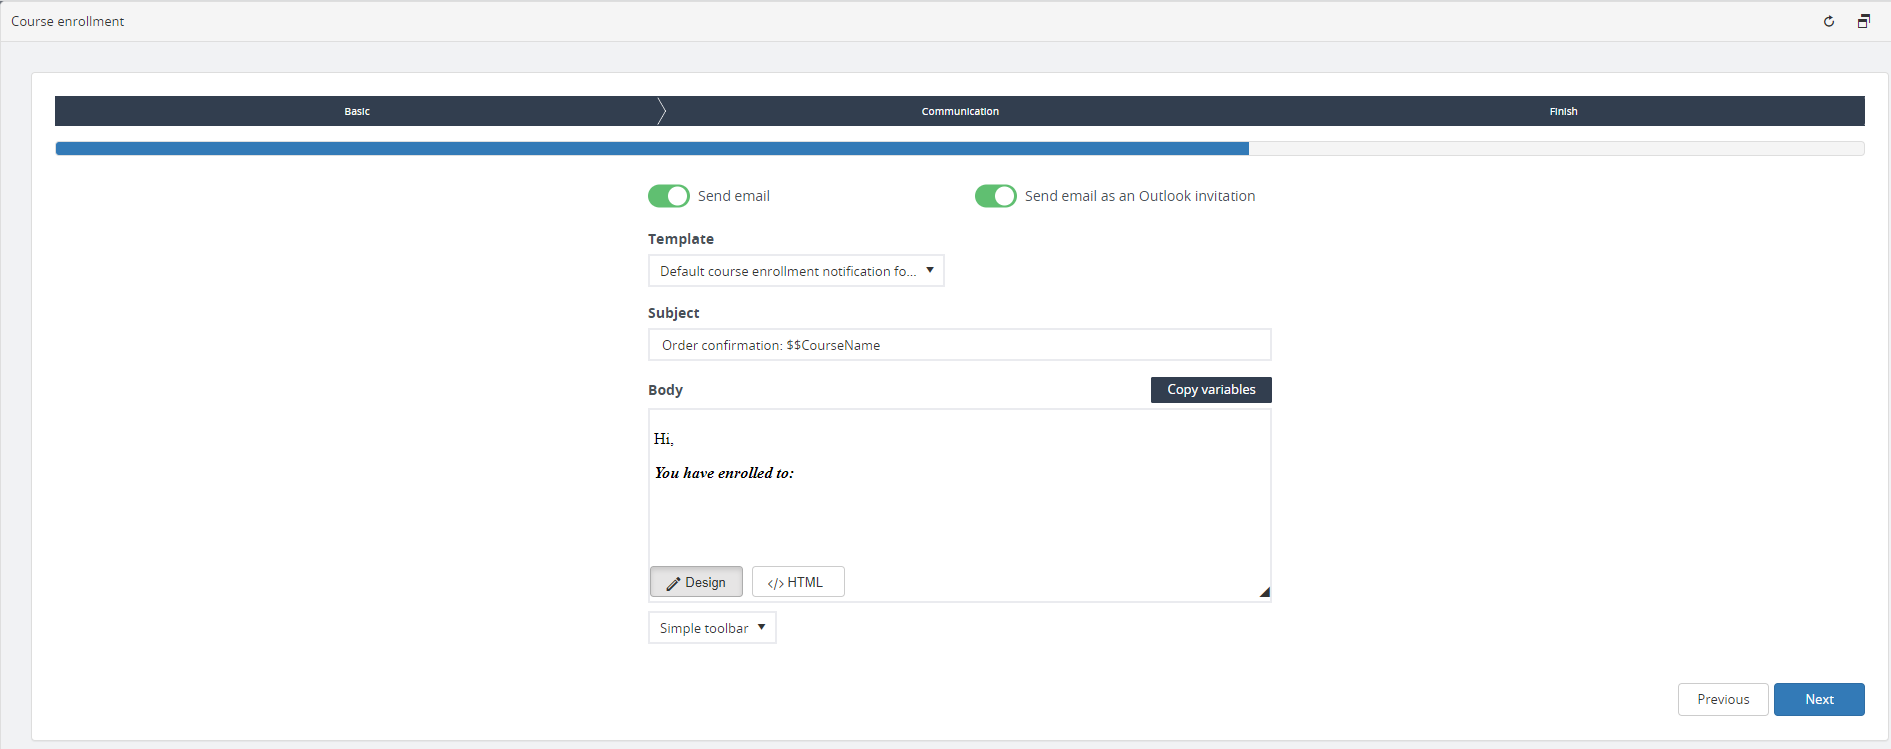
Enable the Send email button if you wish to send an email notification upon a user’s enrollment. Set a specific status for a user on the course if it is required. Click Next to proceed to the last step.
Note: The option “Yes – let me set status on the courses for the users” isn’t set for all users.
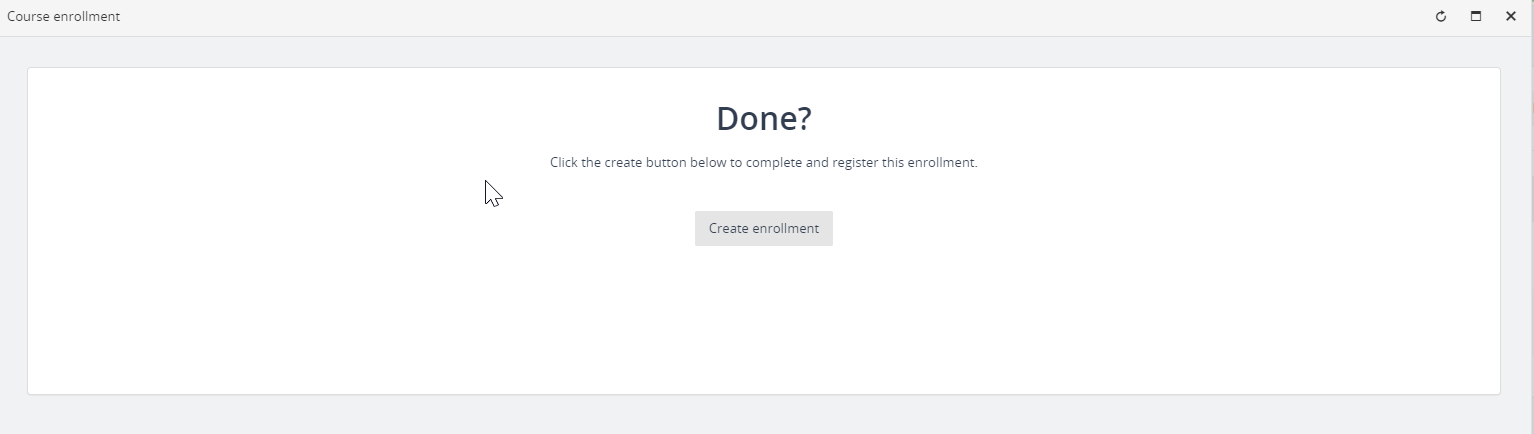
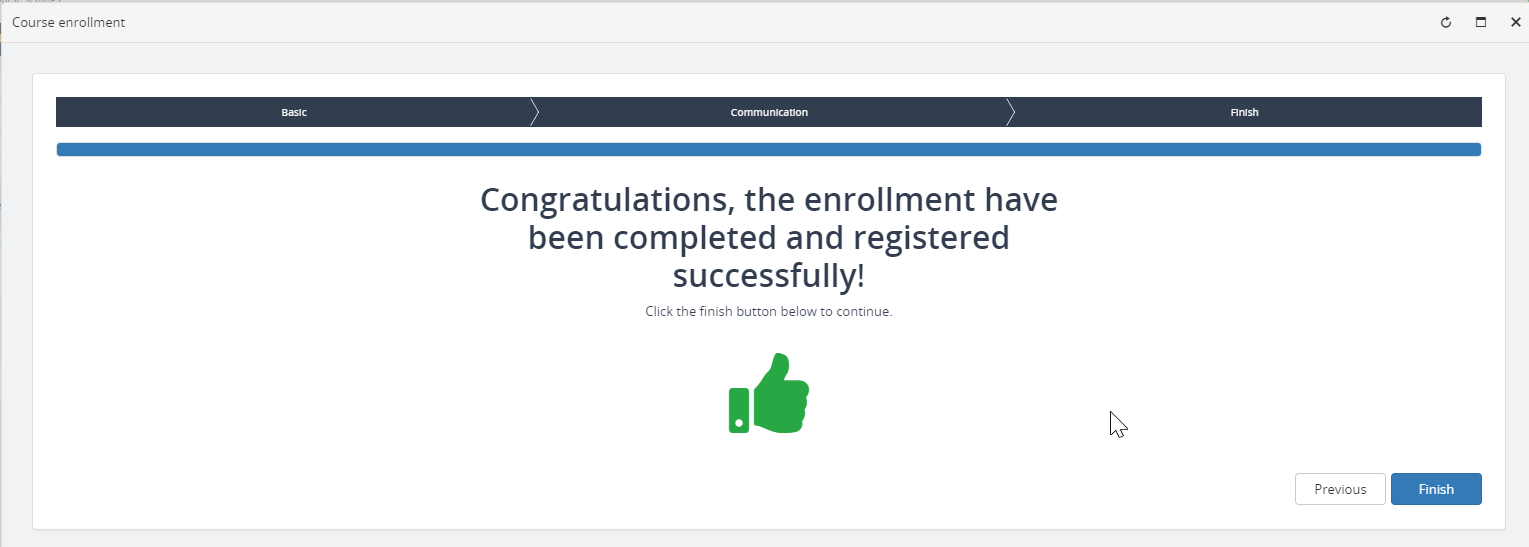
Click Create enrollment to confirm and complete the process. Once enrollment is successful, a confirmation message will appear. Click Finish.