The Control Panel Definition Admin
Updated 3 years ago /
7 min read
The Control Panel Definition Admin is where the settings for the Control Panel are contained to help instructors, managers, and coordinators manage the learning platform. This is where you can set up the different settings, modes, and tiles in the Control Panel so that users only access the features that make sense for their role. For example, if the user is a course administrator, they should probably only see the Course mode. You can access it by clicking Edit Active Control Panel Definition in the Solution Admin.
Note
Make sure you are in the right solution before you make any changes to it.

Each of the elements has an icon that tells you what type it is, for example, Modes, Categories (tiles), Settings or List pages. The Refer to type is not really editable, because it references another element - you can see where in the Build-in page identifier field. To hide this type of element, you have to hide the element it refers to.
Below are some of the modifications that you can do (with the steps) in the Control Panel Definition Admin:
Set up a mode for a solution
You can set up the modes and tiles that represent the different features in the Control Panel. To set up the modes for a solution:
- In Full Admin, click System Admin, Solution Admin.
- On the page that appears, click Edit Active Control Panel Definition.
- To create a new mode, right-click on any element and choose Add Item.
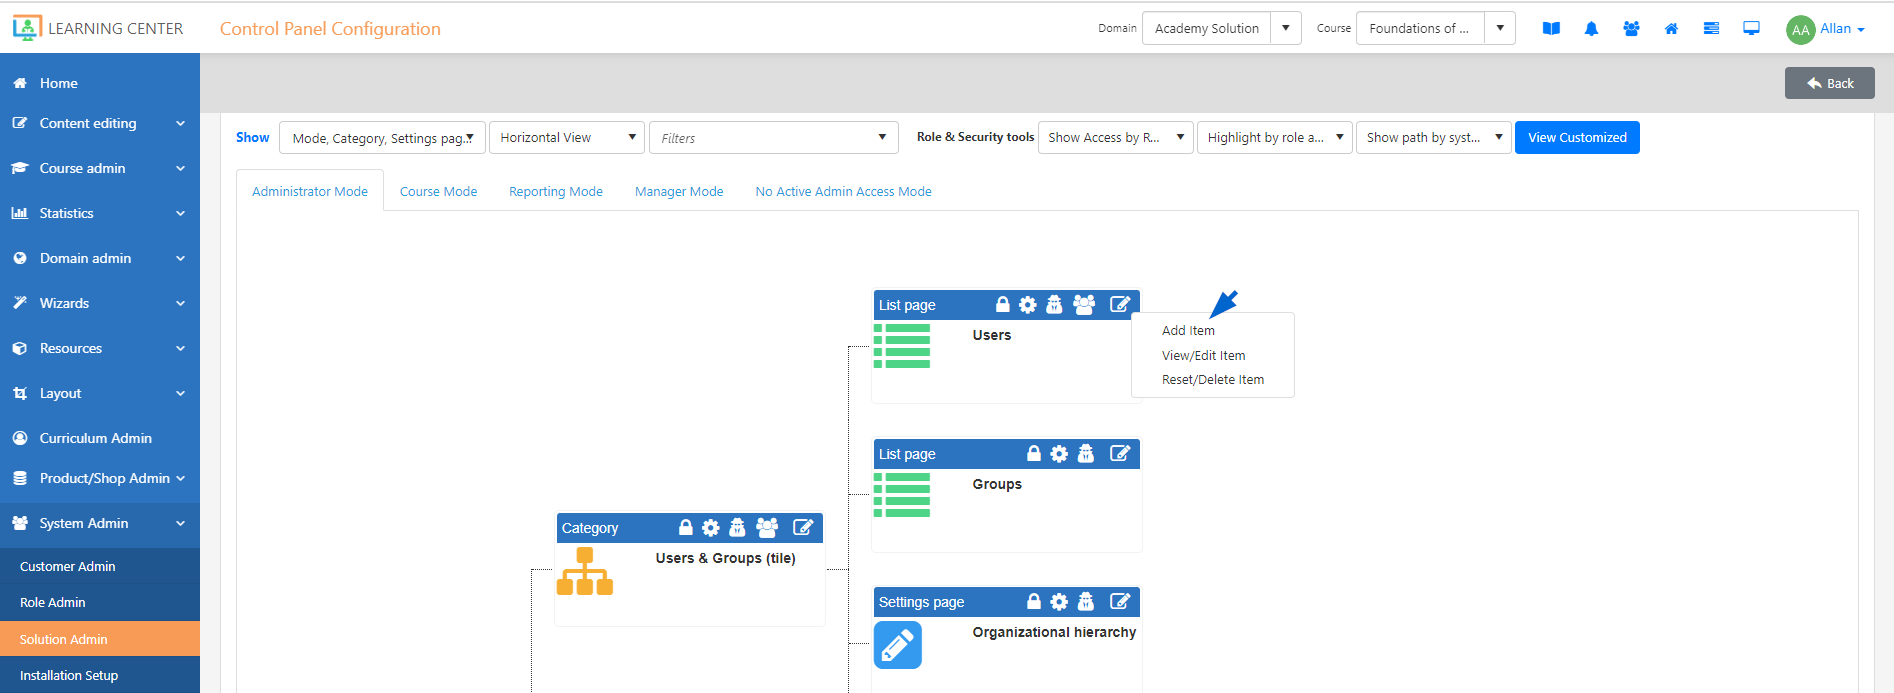
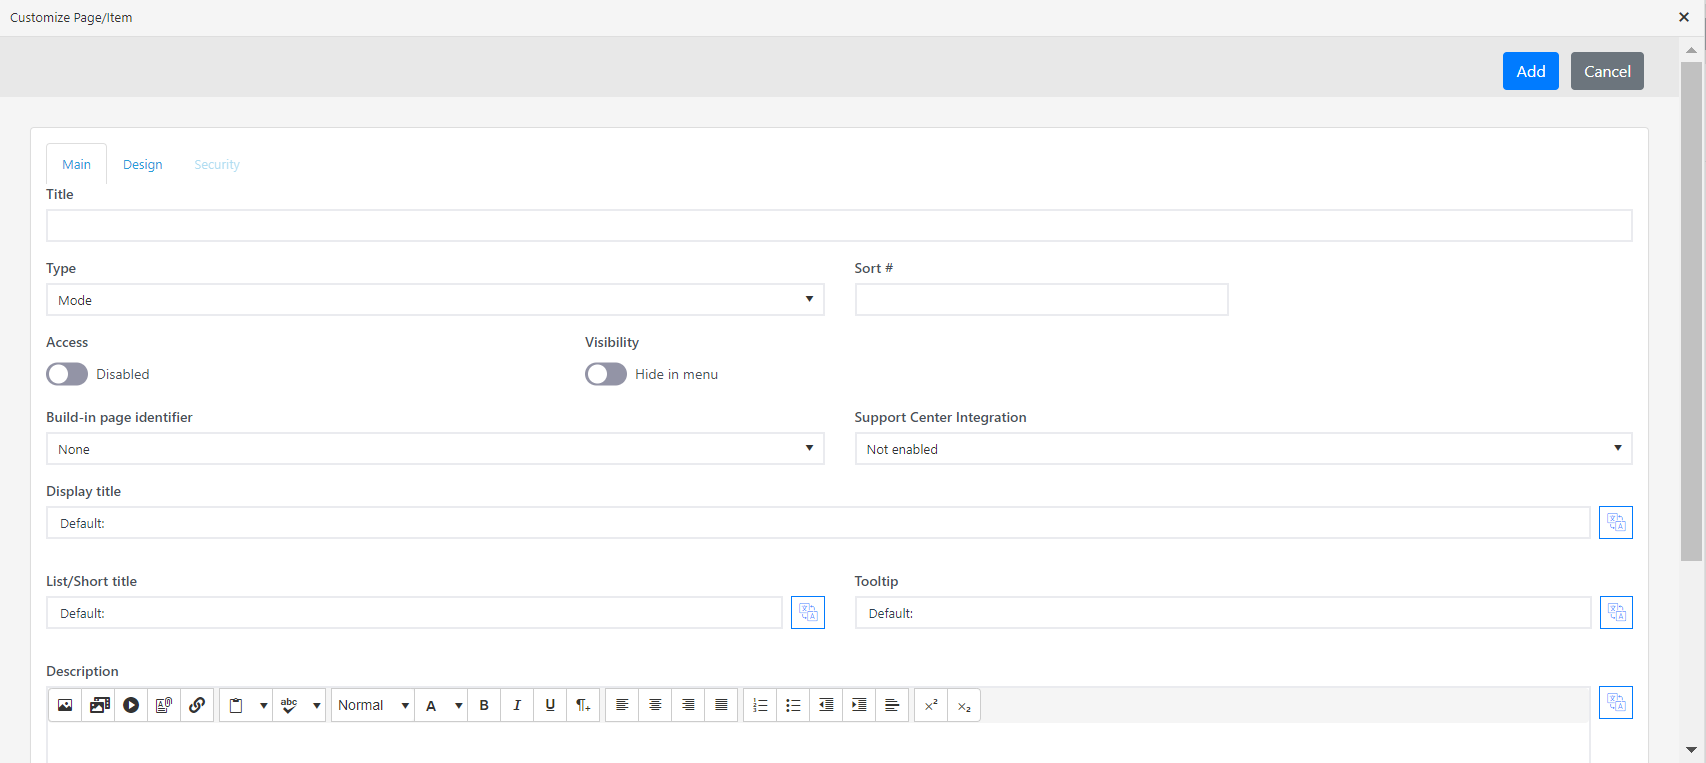
- On the Main tab, enter a title for your new mode and in the Type dropdown, choose Mode.
- To add tiles to the mode, right-click the mode and choose Add Item.
Note
The information in the field (below the Type dropdown) must correspond to the type that you have selected. If you choose Navigate to, for example, you should insert a URL to direct your users to the correct page in the Control Panel.
- On the Design tab, you can decide how your tile should look like in the Control Panel, for example, you can customize its color, icon, whether it displays a widget with data, and so on.
- Click Add.
Note
You can only access the Security tab once you've saved your new tile.
Set up the security settings for a tile or mode in the Control Panel
You can grant or restrict user's access to the features and actions in the Control Panel. To set up the security settings:
- In the Edit Active Control Panel Definition, on the relevant tile, click the Edit
 icon.
icon.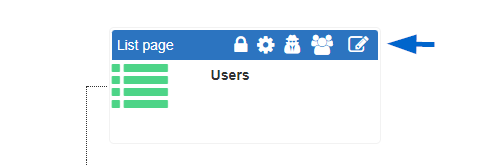
- On the Security tab, in the Role Access section, select a role that you want to give access to the feature then click Apply.
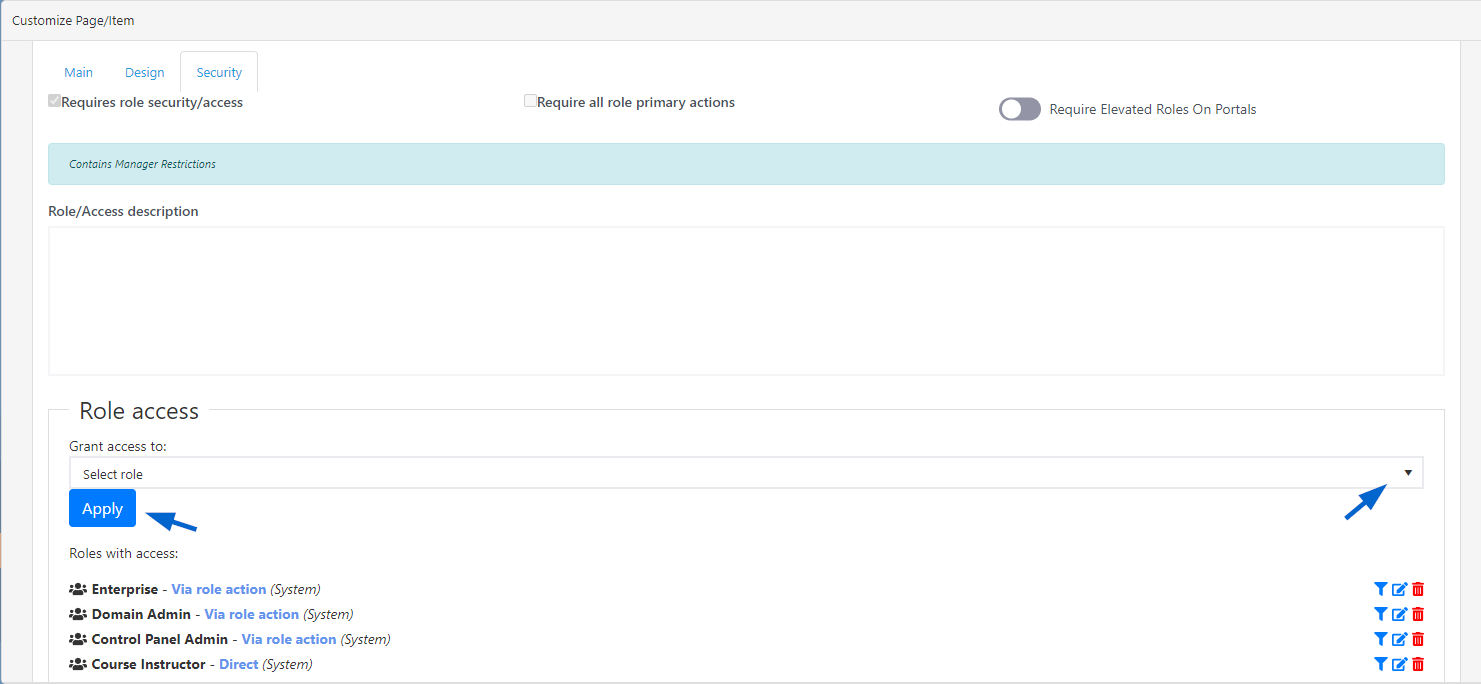
Note
Specifying the security settings of top-level items also impacts the items underneath them. So if you hide a top-level item, all the features and settings underneath will also be hidden.
- To specify the actions that users can access in the tile, under Actions dropdown, select an action to be assigned to the role in the Assign to dropdown. Click Assign.

- Click Save.
Localize the labels in the Control Panel
You can translate the labels of the tiles, modes, and options in the Control Panel so that they will appear to your users in their preferred language. To localize these labels in the Control Panel:
- In Edit Active Control Panel Definition, on the relevant tile, click the Edit icon.
- On the Main tab, in the relevant field, click the Language localization icon.

- Click Add and choose a language, for example, DA.
- Enter the translation that corresponds to the language that you've selected and click the Check
 icon.
icon.
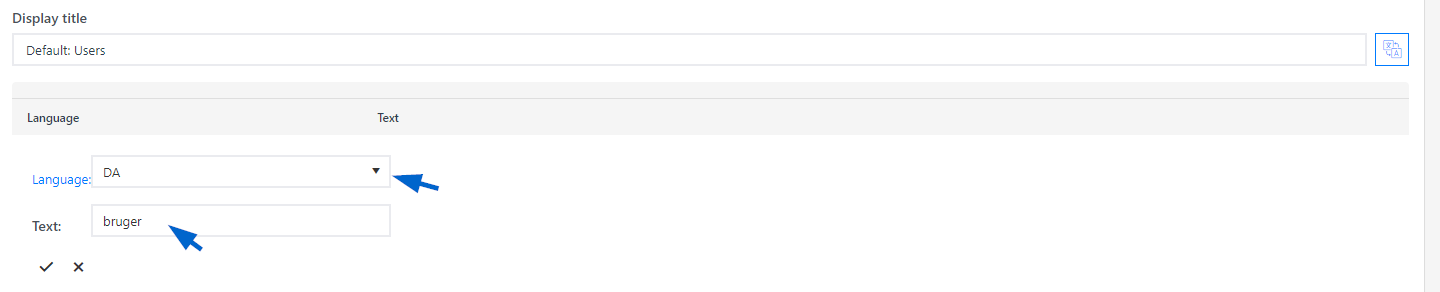
- Click Save.